As much as my fiancé doesn’t want to admit it, there is no way either of us are getting through this wedding dry eyed. So to dress up our much needed handkerchiefs, I’m adding a secret little morse code message for him. Follow along for our super easy DIY wedding handkerchief that even the “non-sewers” can finish in an hour or less.
Supplies
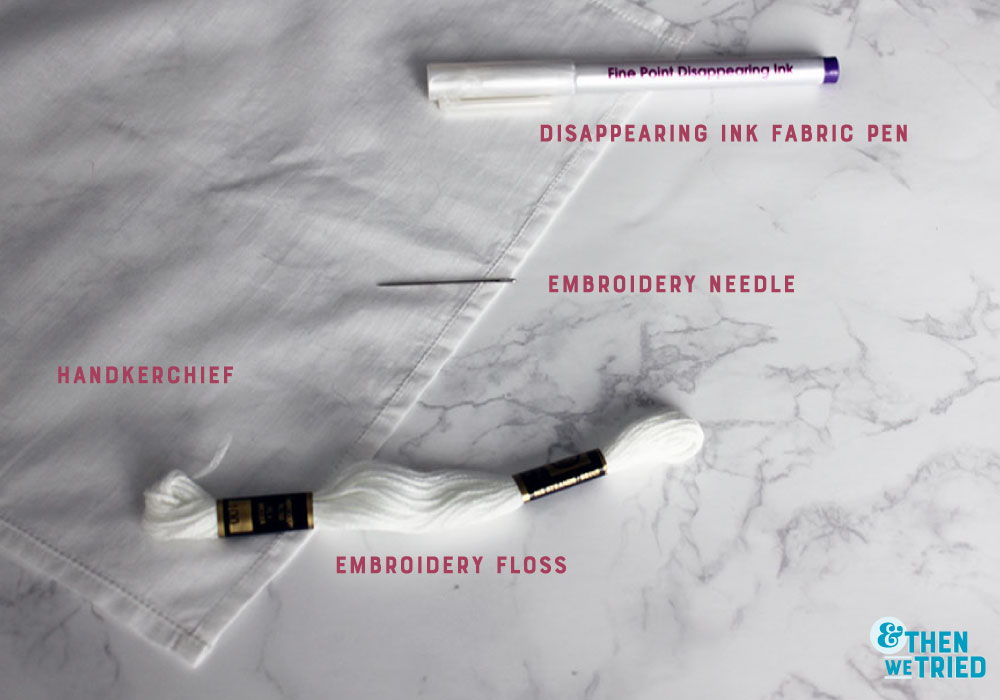
- Disappearing Ink Fabric Pen– This one is my absolute favorite. I’ve never had an issue removing it from a bunch of different fabrics and it will disappear on it’s own if your fabric is too delicate to wash.
- Embroidery Needle
- Handkerchief- I loved the vintage selection from this etsy seller.
- Embroidery Floss- I used white for a subtle message but feel free to switch it up with a colorful version.
Step 1
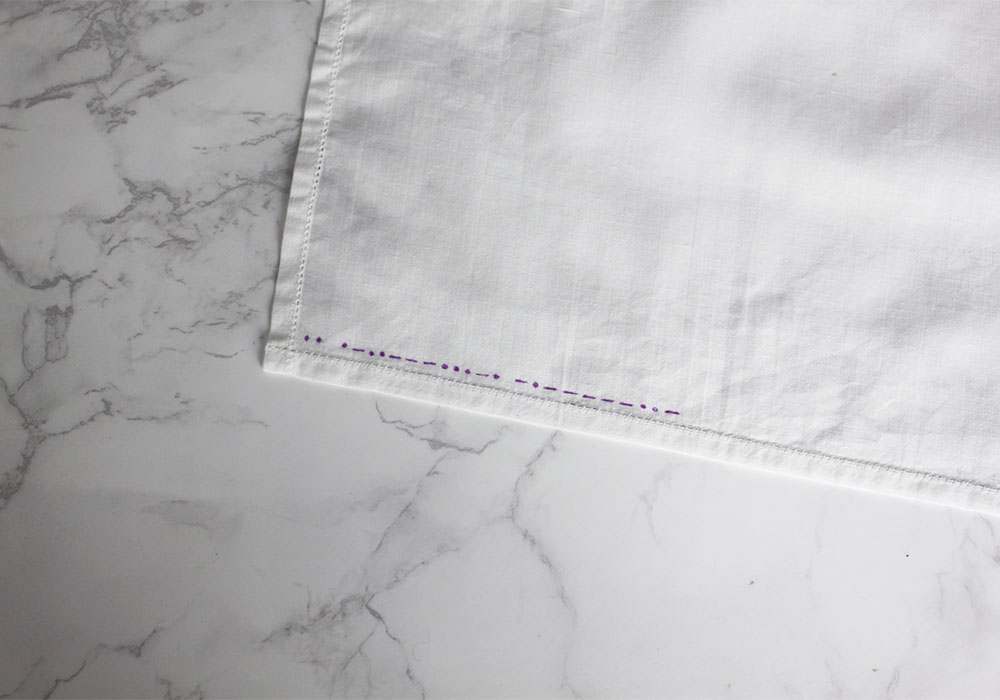 Choose what you’d like to put on the handkerchief and draw a pattern for yourself using the disappearing ink. I went with the classic “I love you” but you could easily add a saying the two of you have or an inside joke. You can see all the morse code letters here.
Step 2
 Pull apart your embroidery floss so that you’re only using two strands of thread. This will keep the stitching delicate and thin.
Step 3
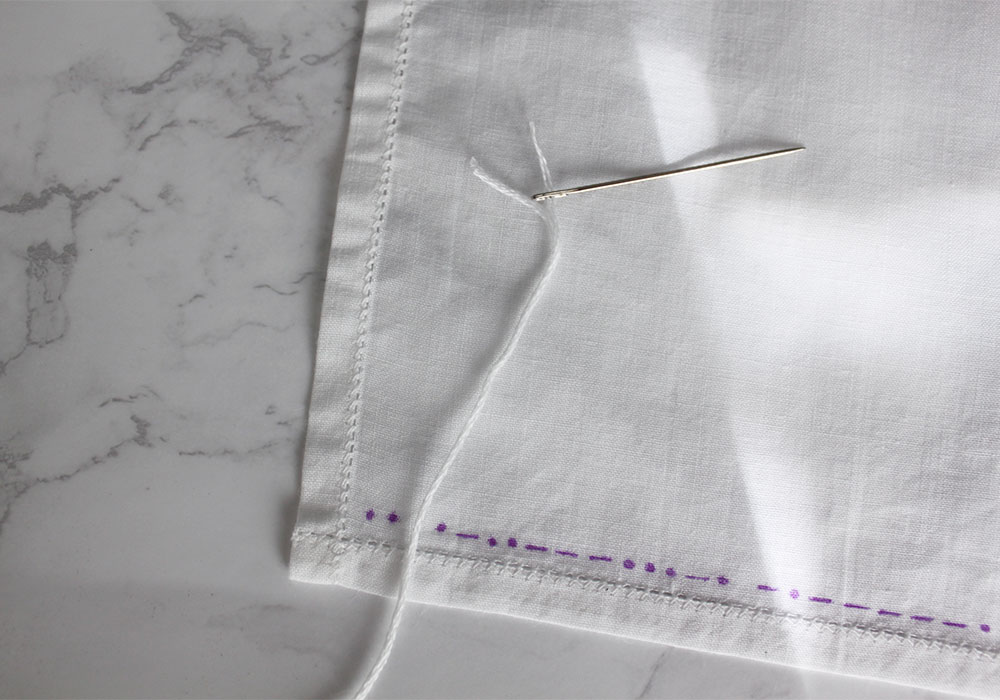
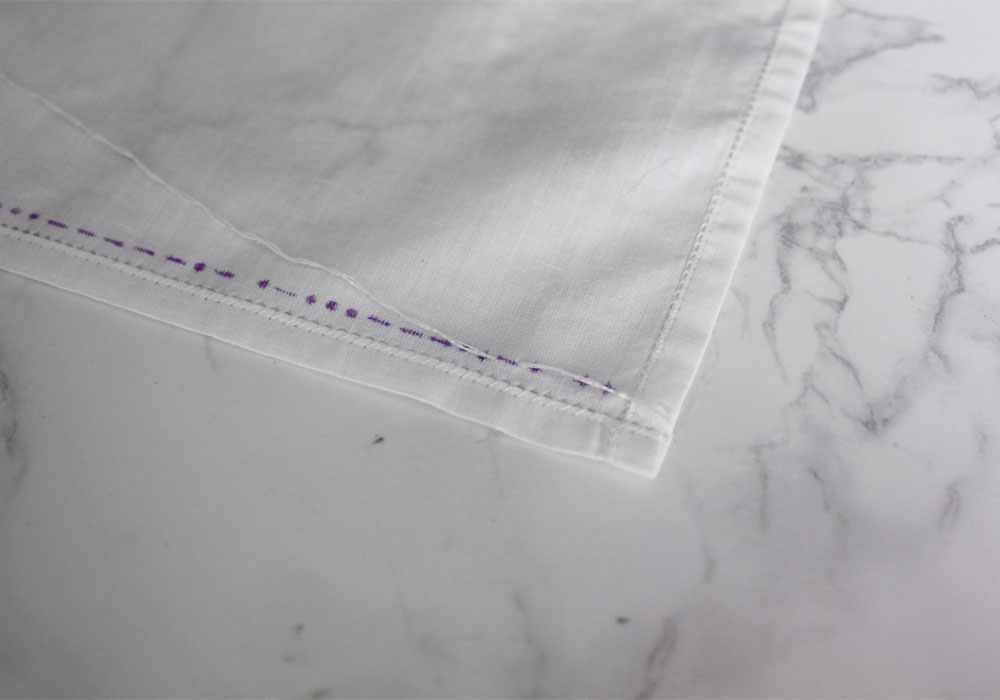 For the straight stiches, start and stop your stitch at the length you drew and tie off in the back. Tie your knots firmly so they don’t unravel. For the dots, start your needle from the back, tie one or two knots on the front and then return the needle to the back so that you’re knot is in the front. Tie off your knot in the back.
Finished!
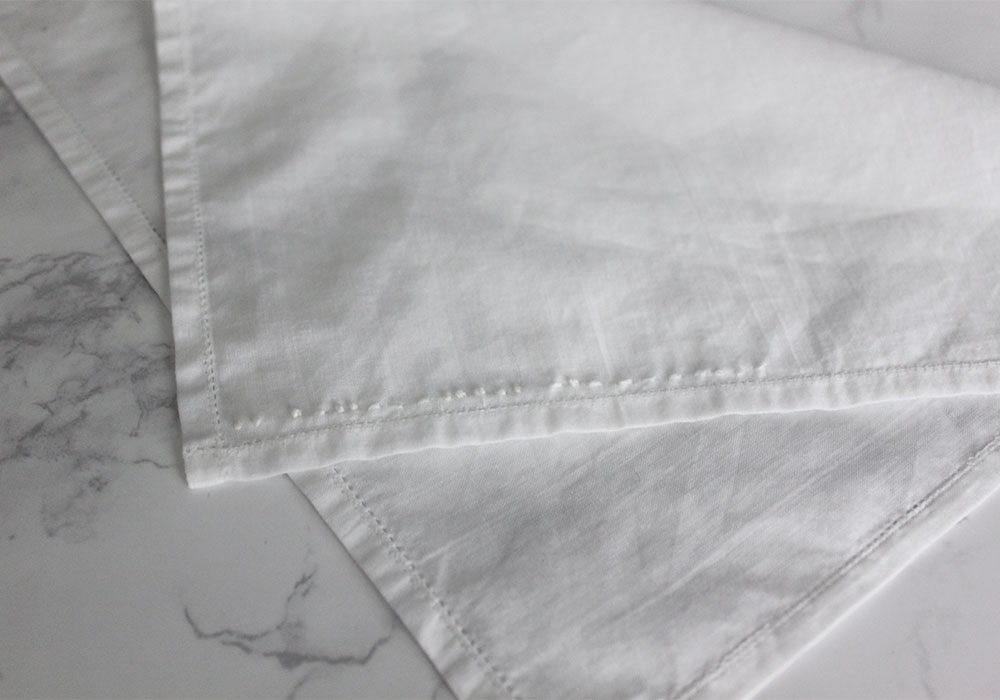 Once you’ve finished your all your stitches, gently blot away the ink or wait for it to disappear on it’s own.
You’re done! This entire project took about one hour and was so satisfying to check off my list! What do you guys think? What would you put on yours?