All I do is think about fences. It’s official. Last year, I moved the fence behind my garage five feet back and we used an auger to dig holes for the posts. That job was so terrible, I still have nightmares about cutting through several feet of bricks and clay. So when it came time to finish installing the fence along my driveway, I knew I was going to do everything I could to convert my chainlink fence to a wood fence and use the existing chainlink steel posts.
Supplies
Oz-Post Steel 2 Wood Fence Bracket WAP-OZ
Bolts, Washers, Nuts
Drill + Bits
Turning a four-foot chainlink fence into a six-foot wood fence
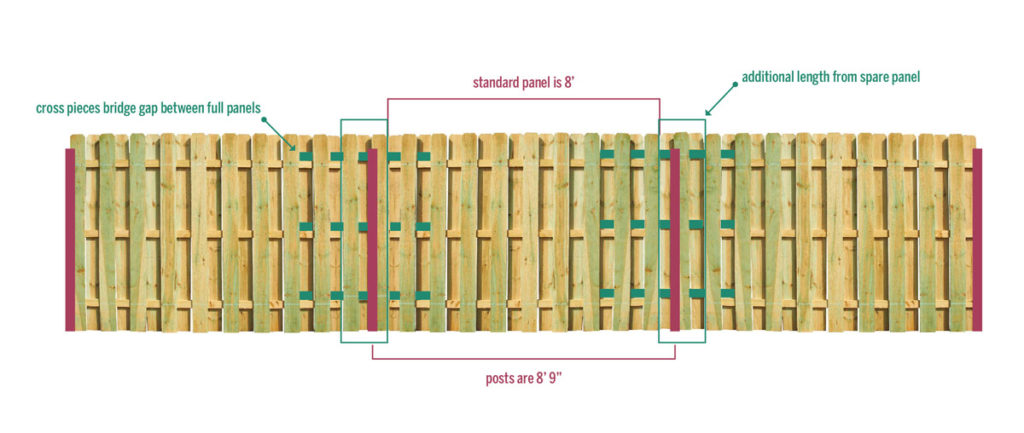
As long as your steel posts are solidly in the ground, you should be able to convert your chainlink fence to a wood fence pretty easily. I had two additional issues I needed to deal with. One: my chainlink fence was set up with the posts spaced 8’9″ apart instead of the standard 8′ spacing. Two: I wanted a 6′ tall fence and the existing chainlink fence was only 4′ tall. Meaning my standard 8′ wood fence panels wouldn’t be long enough to reach the steel posts to connect together with the Oz-Post brackets, and the steel posts weren’t tall enough to properly support the 6′ tall fence. I came up with a plan to bridge the gap in between the panels with a few extra pickets and shared this diagram a few obsessions ago.
I’ve talked about my frustration with the non-standard sized wood cross pieces in the Home Depot shadow box fence panels, so if you get your panels from Lowes or build them yourself, you might be able to skip a couple of these steps.
Step One
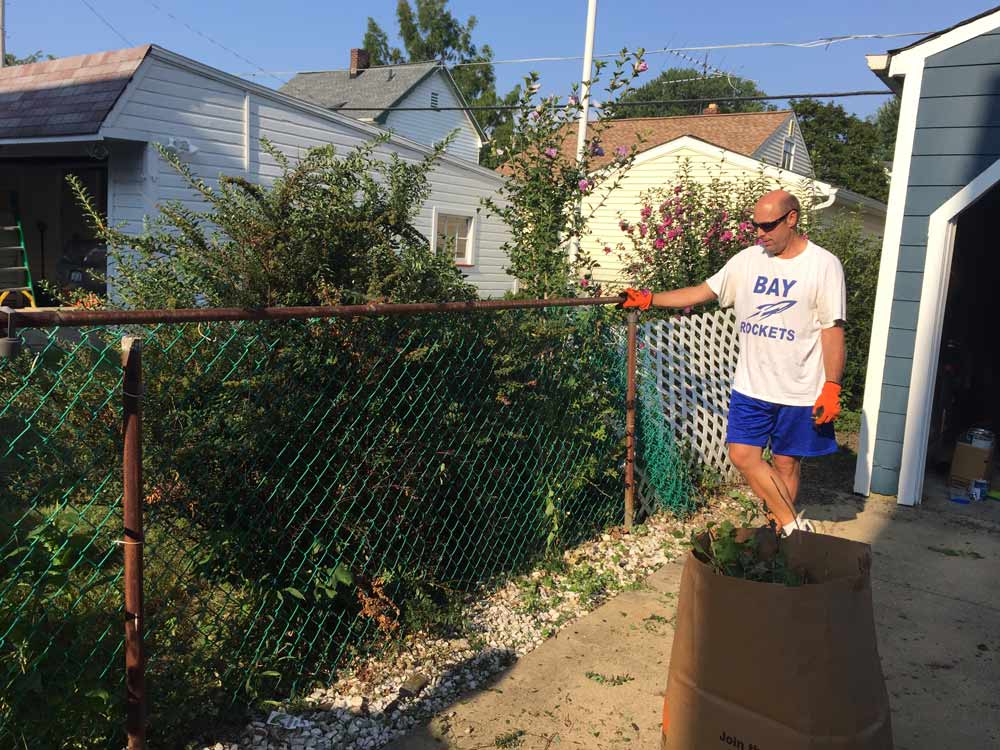
Remove the top rail and all of the chainlink fencing that connects to your steel posts. Then, roll up your chainlink and sell it to your dad for $10.
Step Two
If your chainlink fence was already 6′ tall, lucky you, you can skip this step.
Add height to the steel fence posts by creating a sleeve with a different width fence post. My existing steel fence posts were three different widths: a 2 3/8″ end post at the front where the gate was, two 1 5/8″ line posts in the middle, and a non-standard width post at the back.
Adding height to line posts
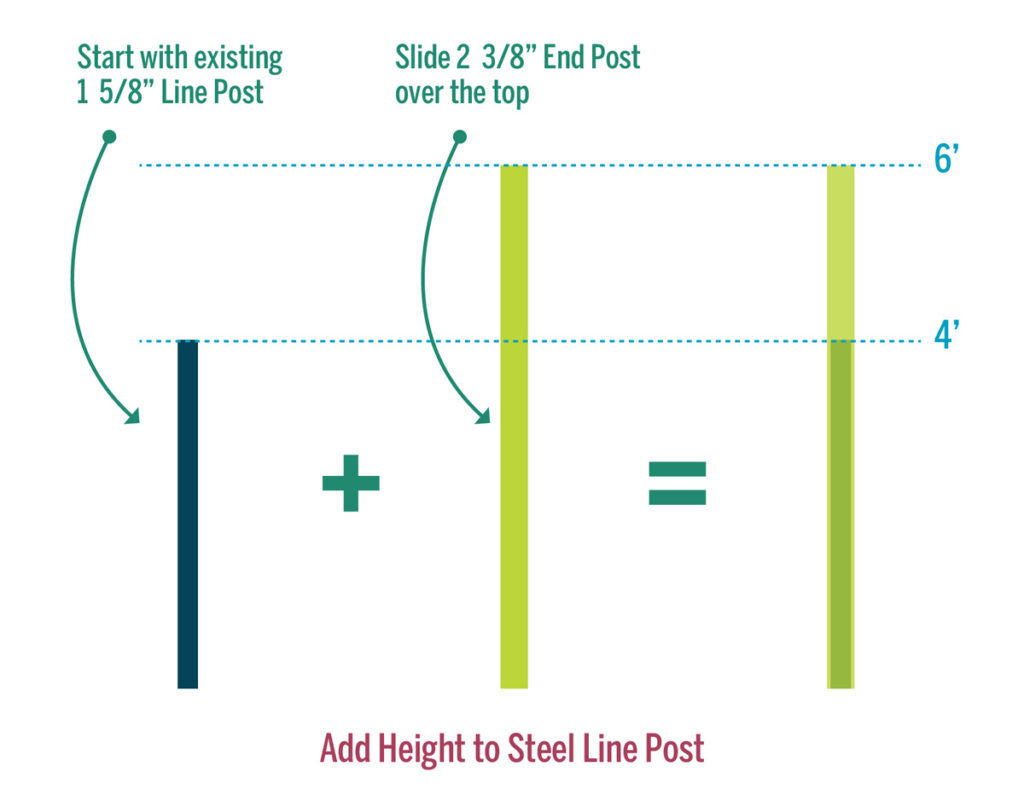
Using new 6′ end posts, cover the middle line posts like a sleeve. The end posts should slide right over your 4′ line posts and give you the 6′ you need to support your fence panels. I didn’t like that the posts made a rattling sound, so I squirted some spray foam in the posts to hold everything tight. I used this same method on the non-standard sized post at the back since the 2 3/8″ end post fit over it.
Adding height to end posts
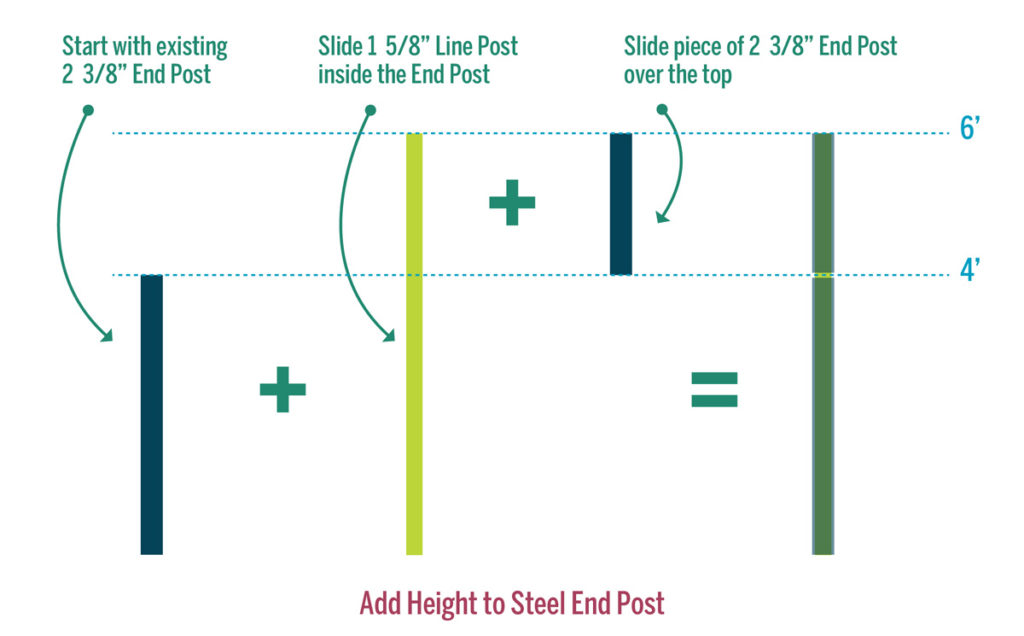
This was a little more complicated because I couldn’t find any steel fence posts larger than 2 3/8″ in diameter to easily sleeve over top of the existing end post. So I used a 6′ tall 1 5/8″ line post to create an inner sleeve. Don’t make the same mistake I did and just drop the line post right in your end post because it might be lost forever. Assuming whoever installed your chainlink fence did a good job, they would have dug a 2′ hole in the ground to set the post, so your 6′ inner sleeve will fall all the way down into your end post and you will struggle to get it back out. So hold on to your 1 5/8″ sleeve post and see if you can feel the bottom of the hole inside your end post before just dropping it in there. If you don’t feel anything solid, throw some rocks or pebbles into your post and keep testing until you feel your inner post connect with them. Once you have your inner sleeve set up with some spray foam to stop the rattling, you can cut a piece of 2 3/8″ diameter end post to complete your 6′ height on top. You will have your existing 4′ end post with a 2′ section sitting on top with your 6′ inner sleeve holding it all together. I pressed some JD Weld Steel Stick around the connection of the two sections of end post to help hold that together.
Step Three
If your chainlink fence posts are placed correctly at 8′ apart, you can skip this step.
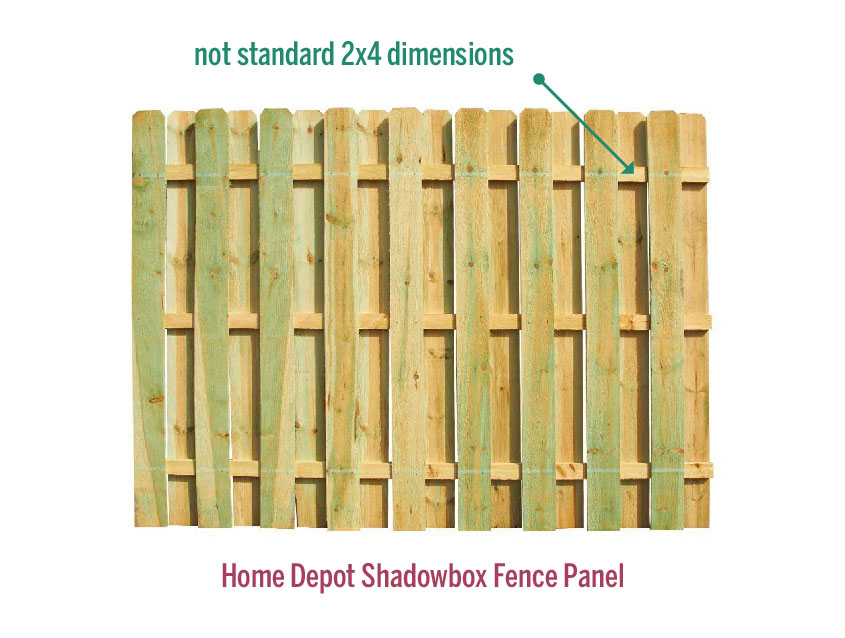
Tear apart the extra Home Depot shadowbox fence panel to use it for individual parts. Be sure to pull out all of the nails from the pickets and be very careful to not break the cross pieces since you essentially just spent $50 on three non-standard 2x4s.
Based on my diagram, I needed to span across the two middle posts with six equal sections of cross pieces (the green bars), so I cut the pieces from my panel in half.
Step Four
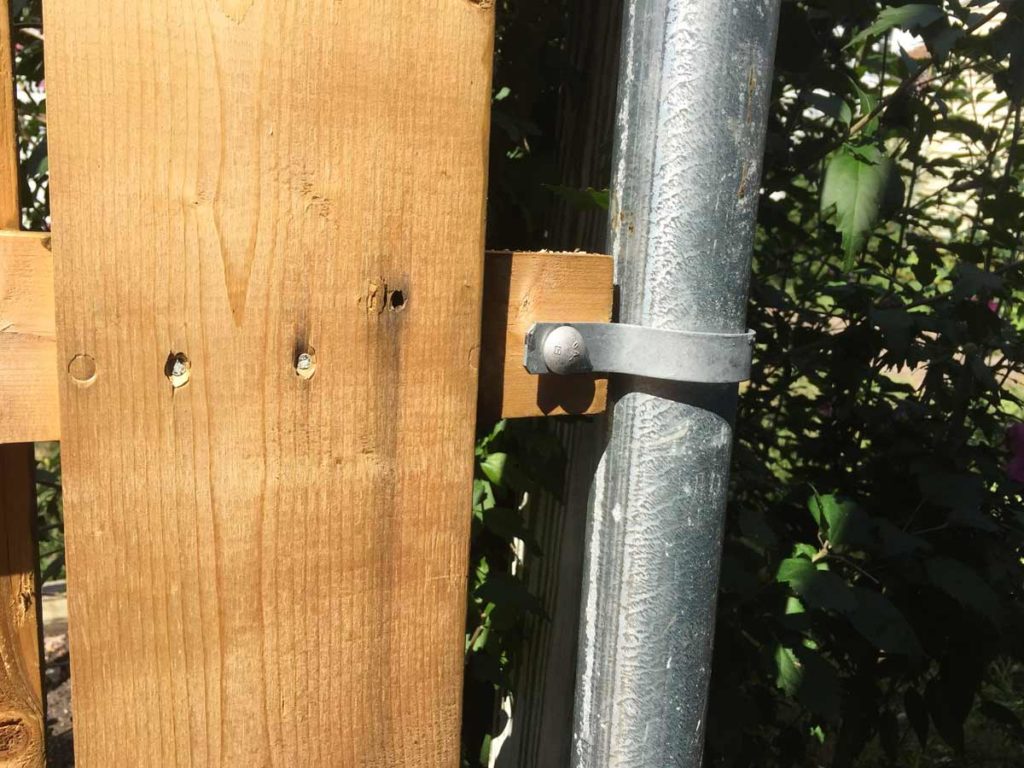
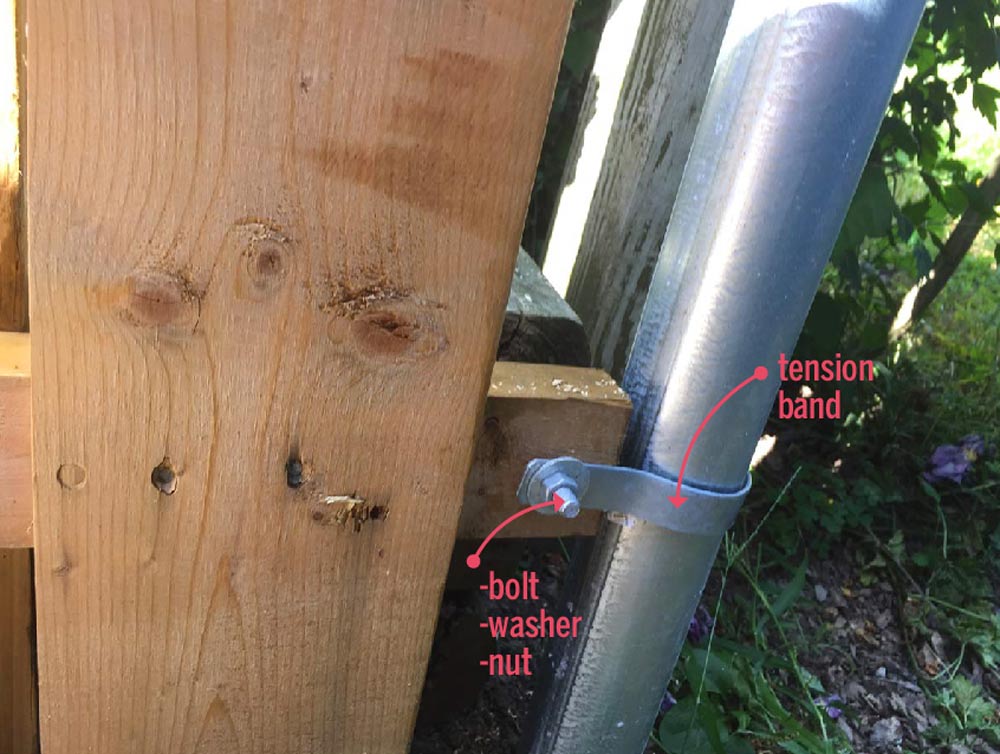
Starting at the front end, attach three tension bands to the steel post and line them up with your fence panel cross pieces. Mark the tension band hole on the cross pieces and drill a hole large enough for the bolt to fit through. Secure one end of your fence panel to the post with the tension bands using a bolt, washer, and nut.
You should still have the other end of the fence panel free. If your steel posts were 8′ apart, your panels should line up and meet at the middle posts so you can move on to Step Six with the WAP-OZ brackets. I still had to bridge the gap using the cross pieces I cut in Step Three.
Step Five
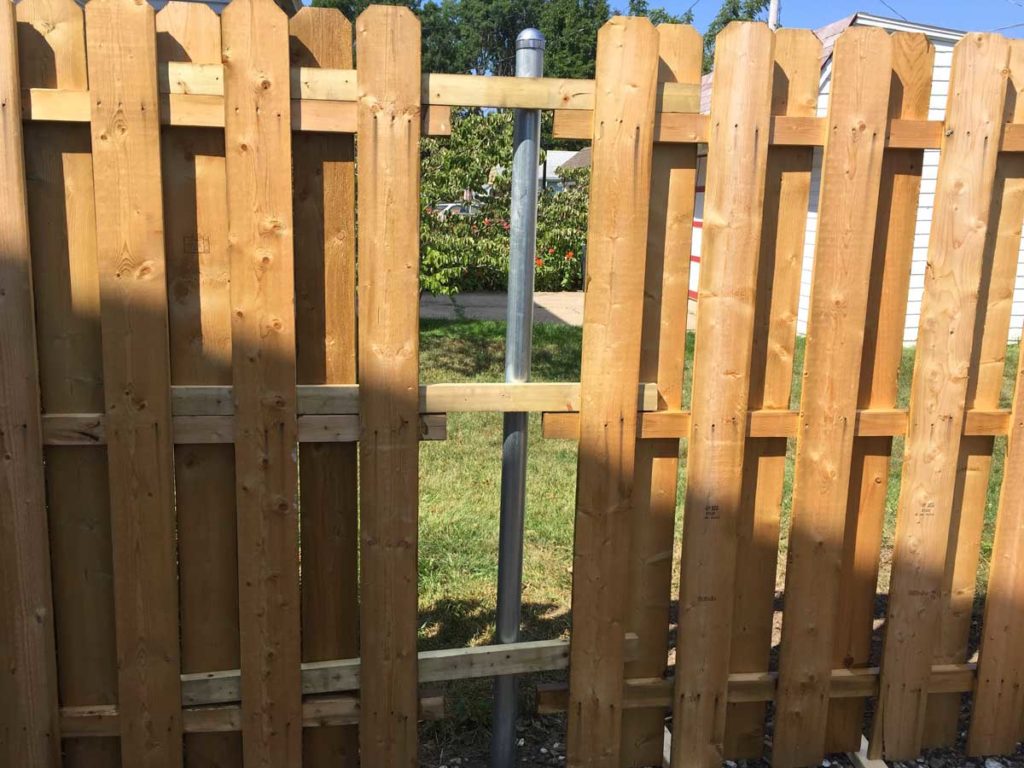
This is a several person job: have someone hold your second fence panel upright in the center of your middle steel posts, slide your 4′ cross pieces on top of the existing cross pieces of both panels. The fit might be a little tight, so you might have to use a rubber mallet to force the wood into place. Next, add the remaining three cross pieces to the end of the middle panel and connect the third fence panel. Once you line up your back fence panel with the last steel post, connect the panel to the post using the tension band method from Step Four. Now you should have your end panels connected to the end posts with the middle panel able to shift side-to-side along the extended cross pieces. Center the middle panel in between your fence posts, for symmetry, and shift your new cross pieces to evenly span your fence panels.
Step Six
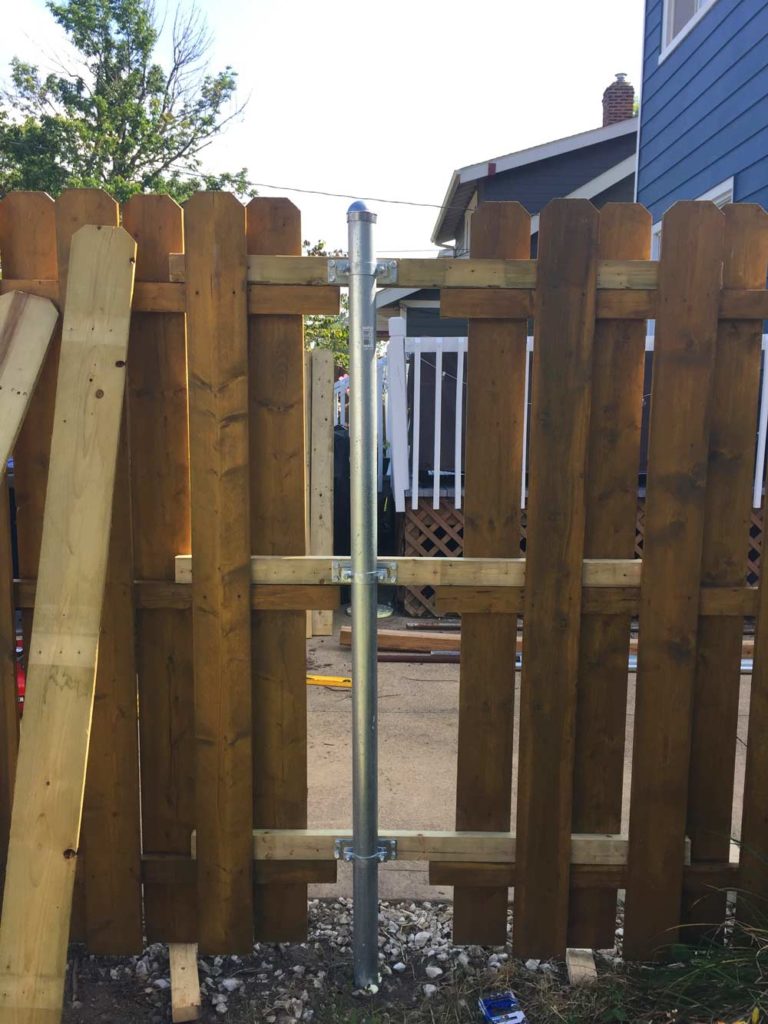
Using the WAP-OZ brackets, connect your three cross pieces to the steel posts. I loosened the brackets enough to slip over the top of the post and dropped all three on before starting instead of taking out all of the screws, but you can use these brackets however you want. If you have a socket bit for your drill, that would be helpful because manually ratcheting all these bolts down was time-consuming.
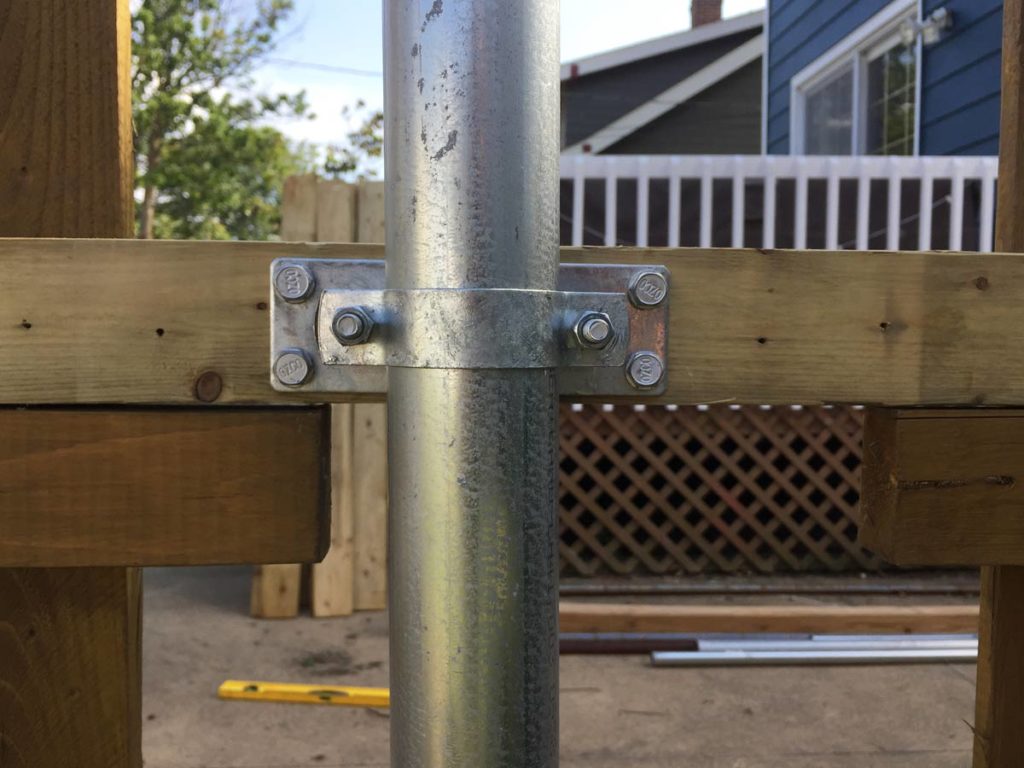
My brackets all connected to my gap-bridging cross pieces, but for those of you with your posts set 8′ apart, you’ll be connecting your fence panels together using the brackets. So your panels will butt together in the bracket.
Step Seven

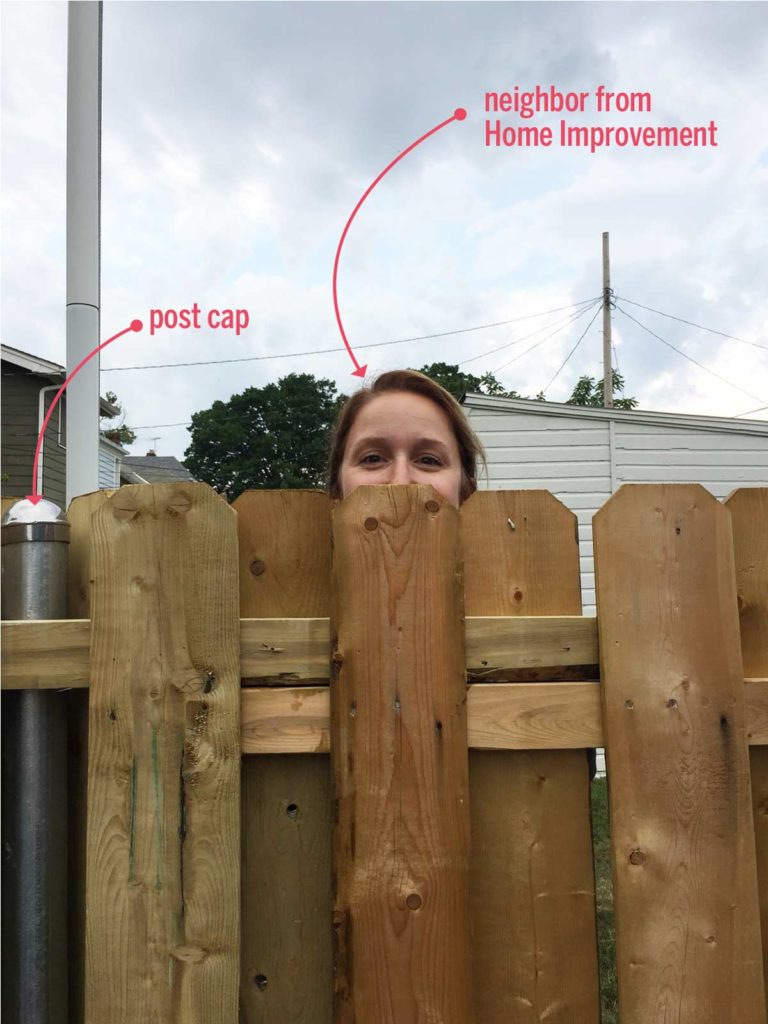
Now that you have your brackets in place, add post caps to the tops of your steel posts so they don’t fill with water in the future. I still needed to fill in the gaps between the panels with pickets, so I lined them up as evenly as possible and used a nail gun to attach them.
Step Eight
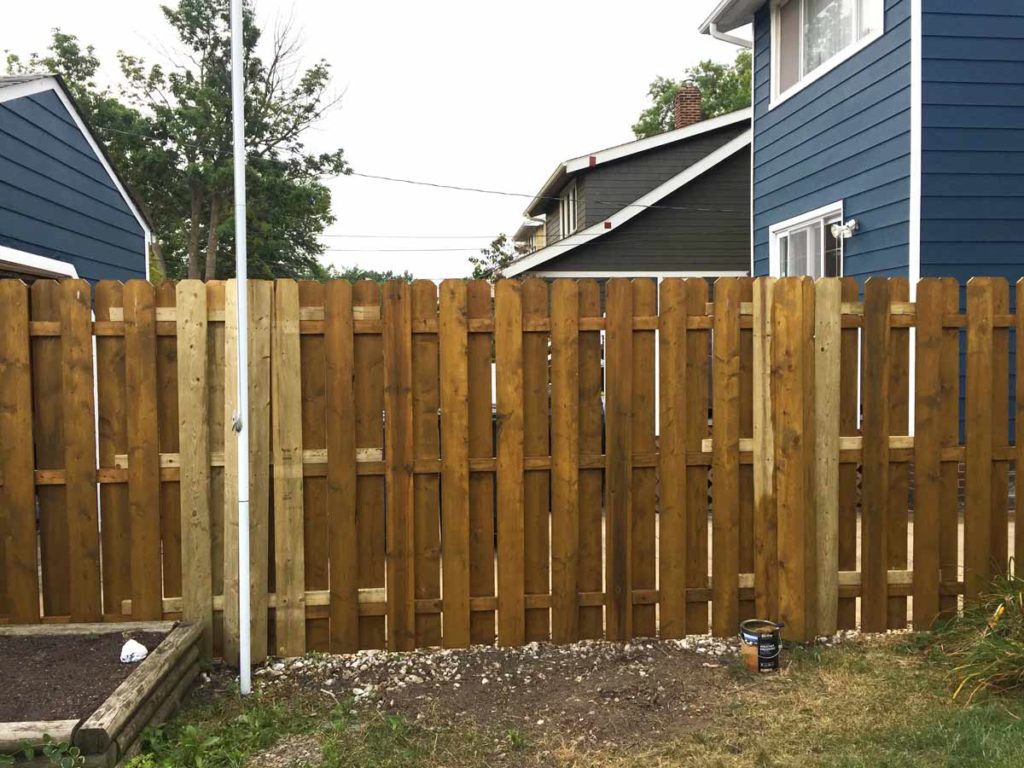
The final task is covering up or camouflaging the steel posts. You can cover up your posts several ways, but since I had some pickets laying around, I used two pickets on each post to make a little triangle box around the post.
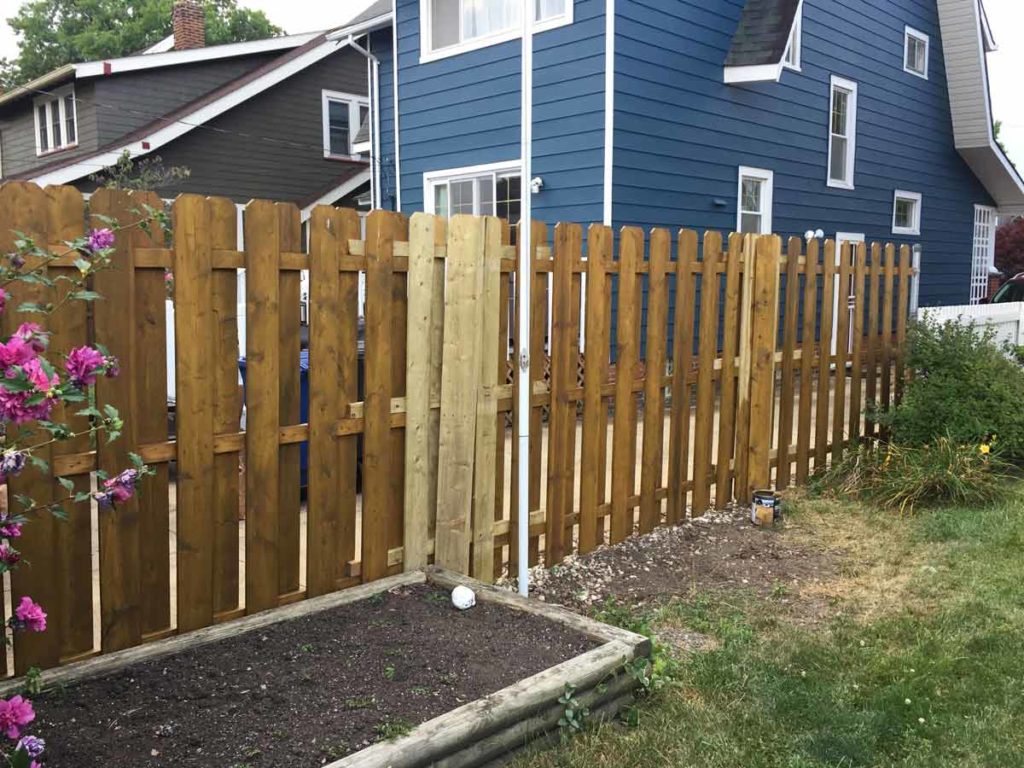
This was big enough to cover up the brackets and the post and once they were stained, they blend in nicely. I still need to figure out how I want to disguise the posts from my side of the fence. You can see them in this picture of some dressers I was selling.
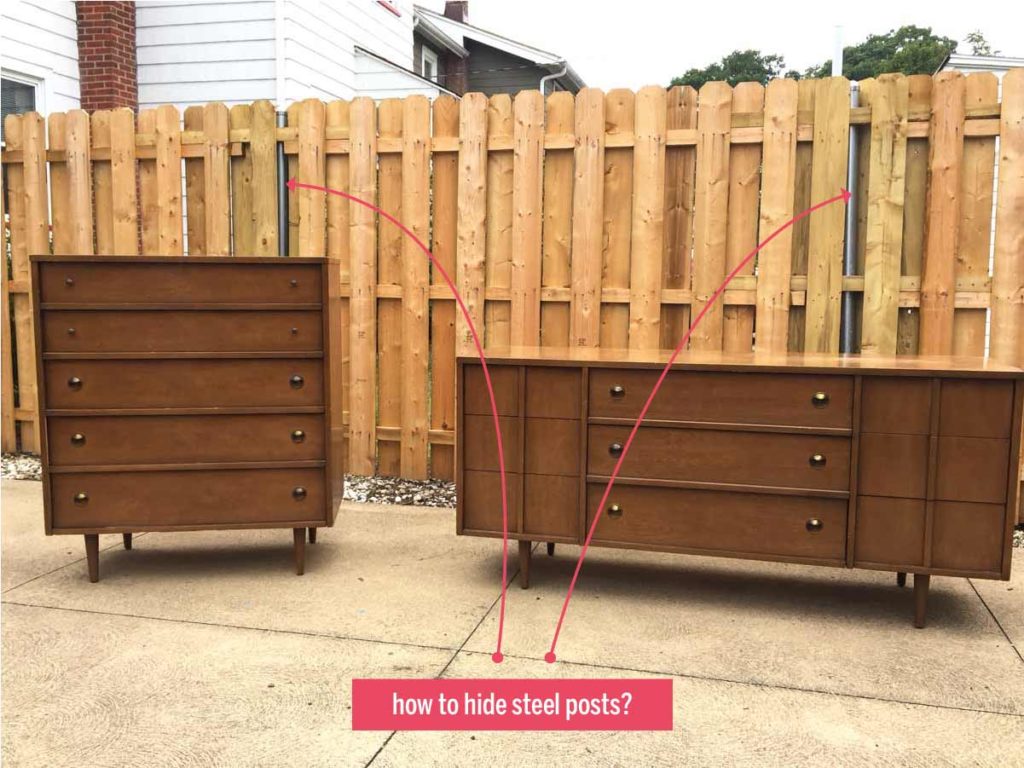
I’m thinking of chopping up a picket and wedging it in front of the post or just nailing a picket on the front. Any ideas? Let me know in the comments.
Bonus/Step Nine
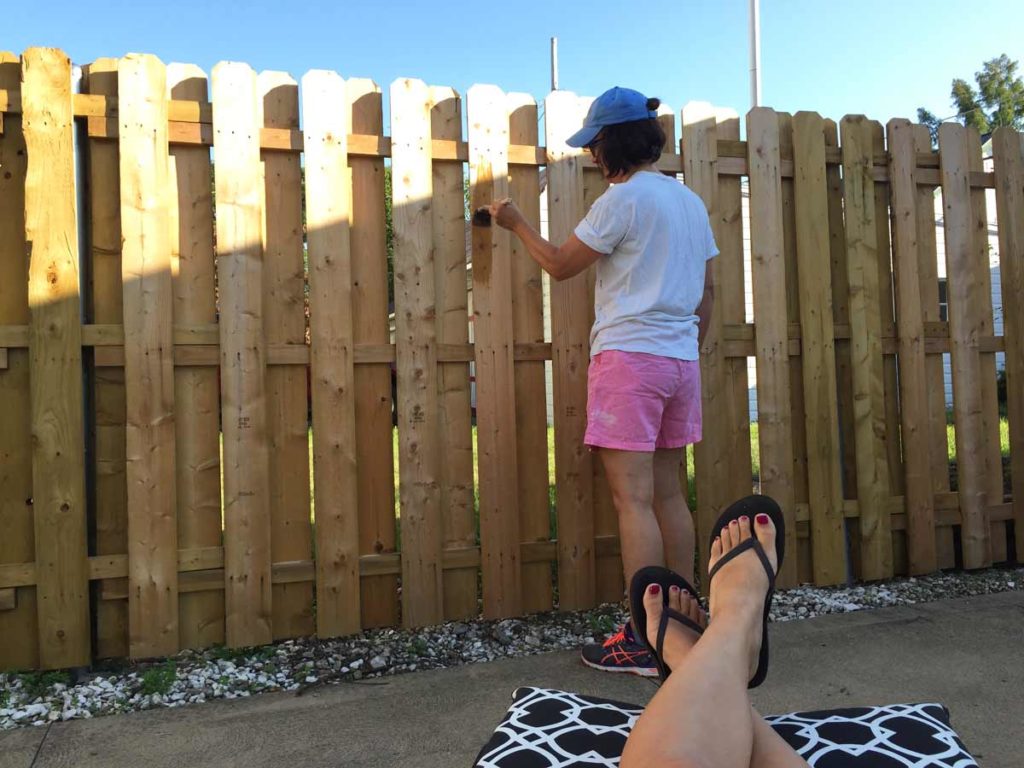
Stain your fence yourself, or get mono and have your mom stain the fence while you sit in a chair and watch her.
Next up is building a gate across the driveway so Freddie can roam free in the yard. Have any of you made your project a little harder by trying to work with what you’ve got in place? Let me know in the comments.