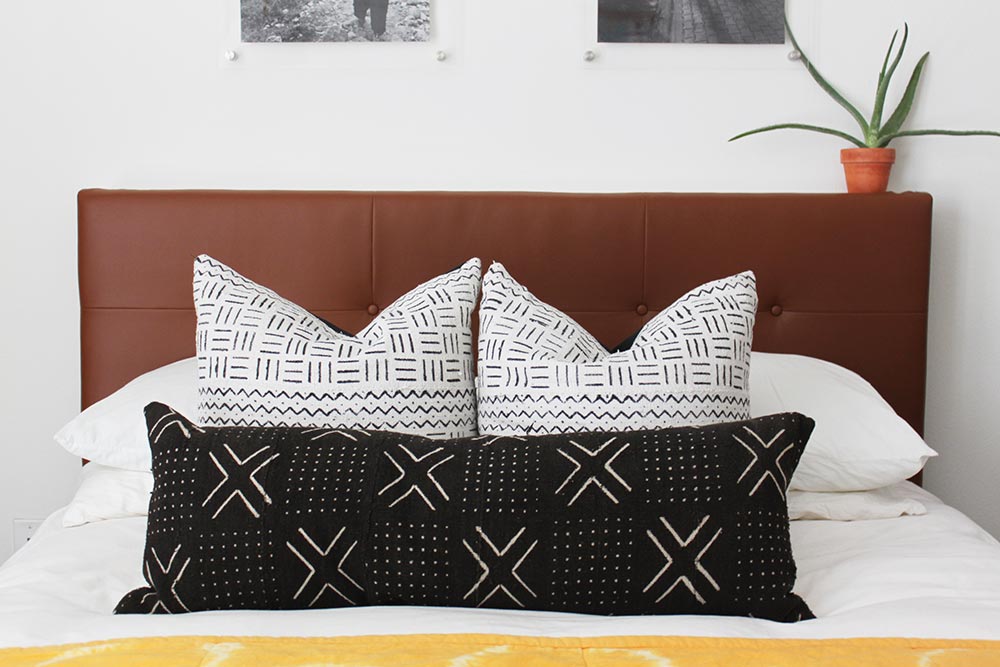
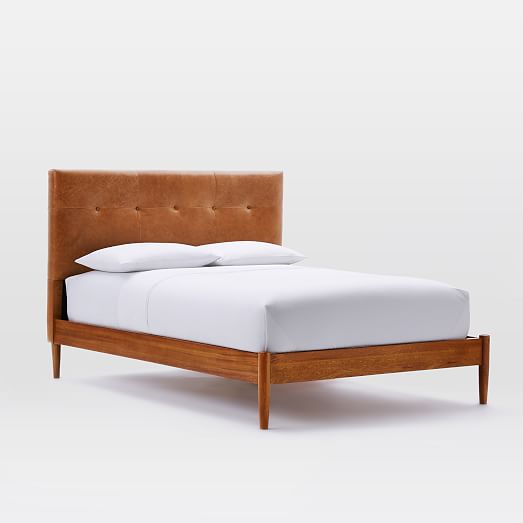
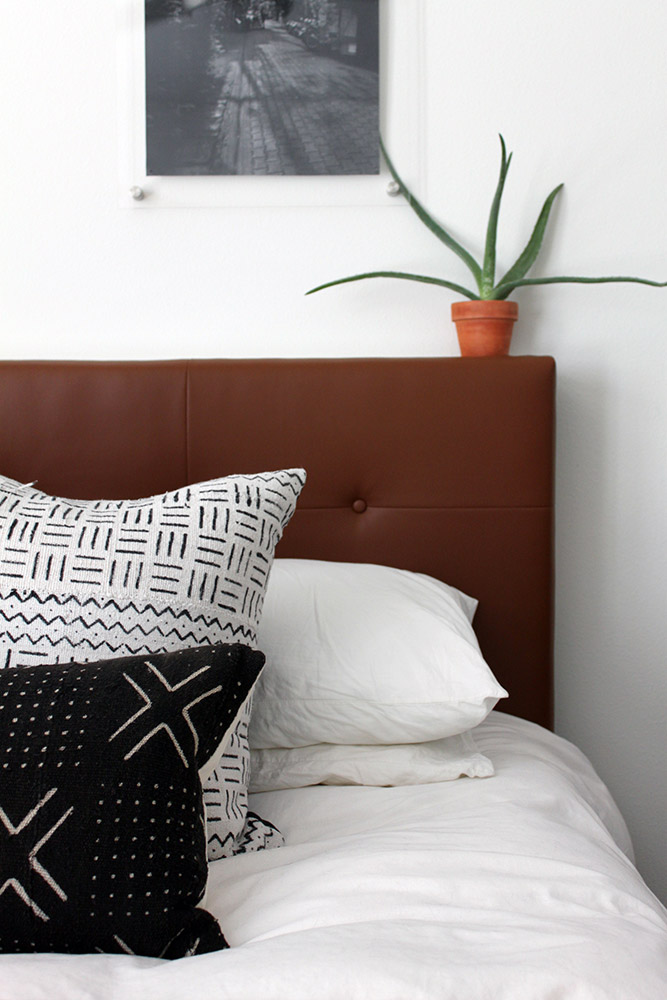
As a person of a certain age (cough, cough, late 20s), I often want nice things but my taste outpaces my bank account. Can anyone relate? This headboard from West Elm has been on my radar for a while now and is so deliciously beautiful. I WANTED it, tried to bargain with myself why I should get it, and thought of things I could give up in exchange. But in the end, my boyfriend talked me off yet another figurative cliff and I challenged myself to make the best knock off version I could. Enter: my DIY Leather Tufted Headboard.
How to make your own DIY Leather Tufted Headboard
Since our previous bed was a low platform style, we needed to purchase a new frame in addition to replacing the headboard. After researching beds vs. bed frames only, I ultimately went with this IKEA Hemnes bed because it got us a new frame and with the low price tag I didn’t worry about covering the headboard.

Here are the rest of the supplies:
- Headboard to cover
- Alternate– Skip covering an old headboard all together and use pegboard as your base layer. You’ll then mount directly to the wall using z-clips.
- Peg board- cut to the same size as your headboard
- You’ll only need this if your headboard has cut out areas like mine or if you’re using pegboard as the base layer. If you are using a solid wood headboard, skip this step.
- Pro tip– Home Depot will not cut peg board so try a local lumber yard or cut on your own saw.
- Drill and wood screws
- High-density foam
- I went with 2” thick but this is what determines how deep the tufted indents can go, so feel free to go thicker if you’d like. They make up to 5″!
- Alternate– If you’re budget conscious, try using an inexpensive foam mattress cover instead.
- Batting
- Basting spray or spray adhesive
- Leather fabric
- I purchased a nice vinyl alternative. You’ll need at least 2.5 yds. for a Queen bed but you may want to order more for wiggle room.
- Pro tip– Fabric.com lets you order samples at a low cost so I ordered a few options to look at in my room with my other furniture and textiles.
- Alternate– If leather isn’t your thing, you can replicate with any upholstery fabric.
- Button kit
- Florist wire
- Heavy duty staple gun
- This low-cost version from JoAnns was great.
- Heavy duty staples
- Upholstery needles
Step 1
Lay your headboard flat and work in an area that you can flip and move the headboard as needed. You’re going to need to be able to get to all angles!
Step 2
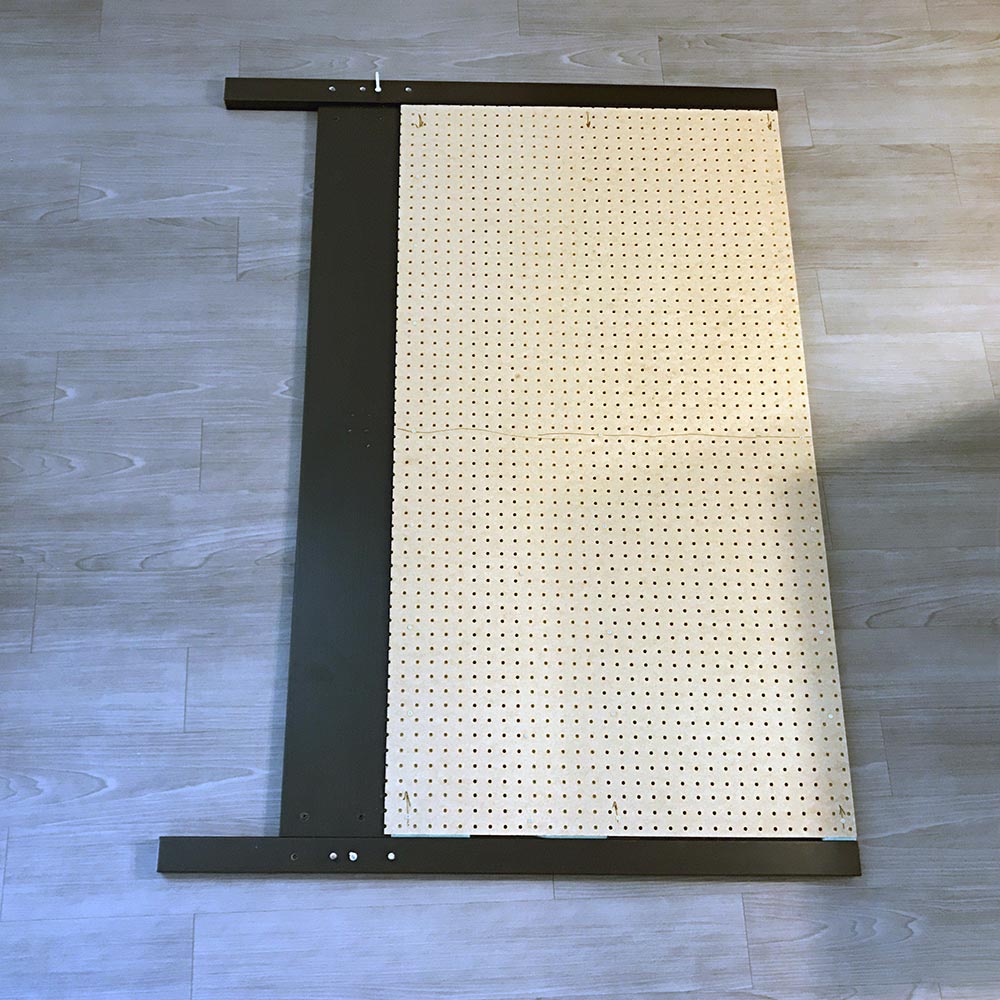
Since my headboard had cut out sections I started by attaching a piece of pegboard over the top to give me a flat surface. I recommend using peg board since it already has pre-drilled holes which will be handy when adding the buttons to tuft. Easily secure the pegboard with a few wood screws on all sides.
Step 3
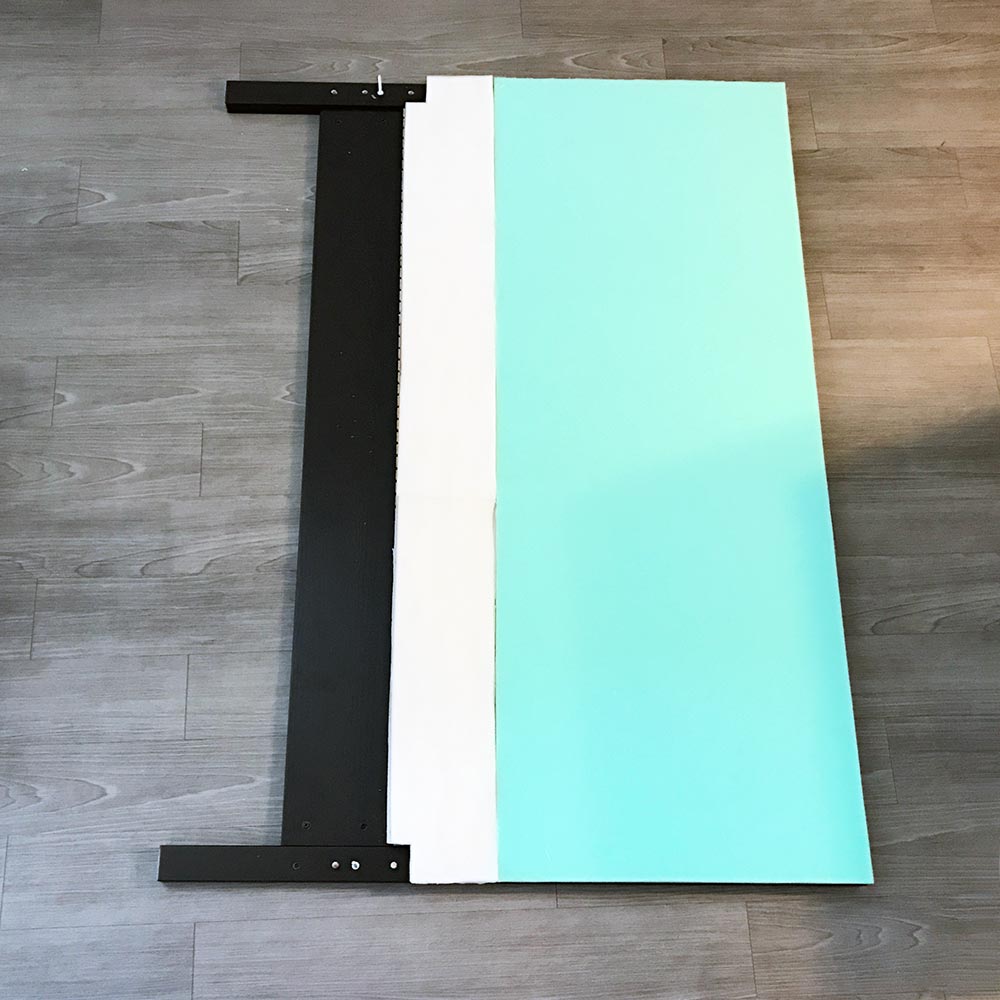
Cut your foam to size. This can easily be done with a box cutter. Use a straight edge and take it slow and it cuts very easily. I then used a spray adhesive to attach the foam to the pegboard. It doesn’t need to be too secure, just enough so you can move the headboard around without the foam falling out of place.
Alternate– The sewing store will sell high-density foam (the green foam) and it is great but it is also really costly. I’ve seen other DIYs use inexpensive mattress pads from Target or somewhere comparable (the tan foam). Since my headboard was too tall for either option alone, I knew I would have to piece the foam in sections. While I was slightly nervous about this, it turned out to be completely fine, especially since the leather vinyl is a thick upholstery material. If you use the mattress pads be aware that they have ridges on one side. This made me a bit hesitant but again turned out fine. Just make sure to put the ridges against the pegboard to keep the flat side out.
Step 4
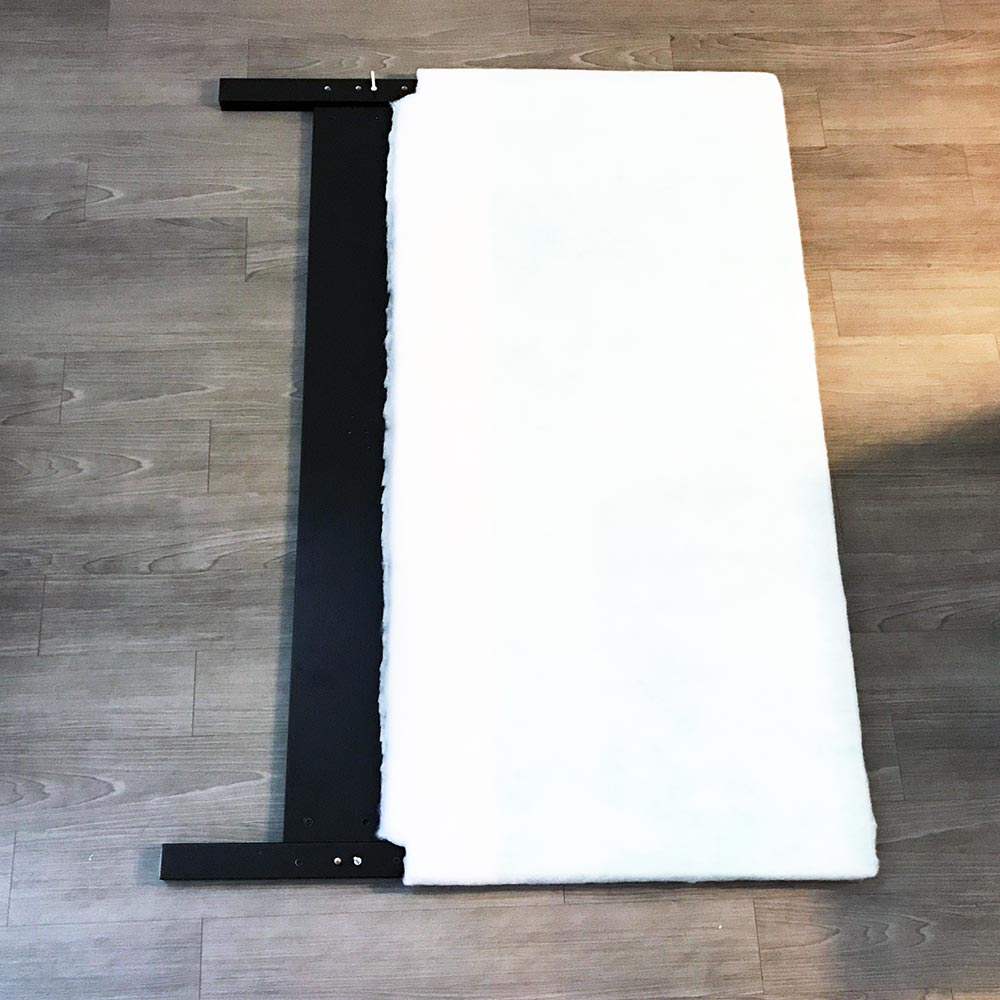
Spray the face of the foam with your spray adhesive and lay the batting across the face leaving enough room on all sides to wrap around the edges. Once the adhesive has dried, flip the headboard onto its face and pull the batting tightly around all edges and staple to secure in the back. You’ll want this layer to look clean and taut since it is the last layer before fabric. But don’t stress, since the leather vinyl is a thick upholstery fabric it will cover up any minor inconsistencies on the face.
Step 5 (Optional)
(Only if you feel like sewing or making things harder)

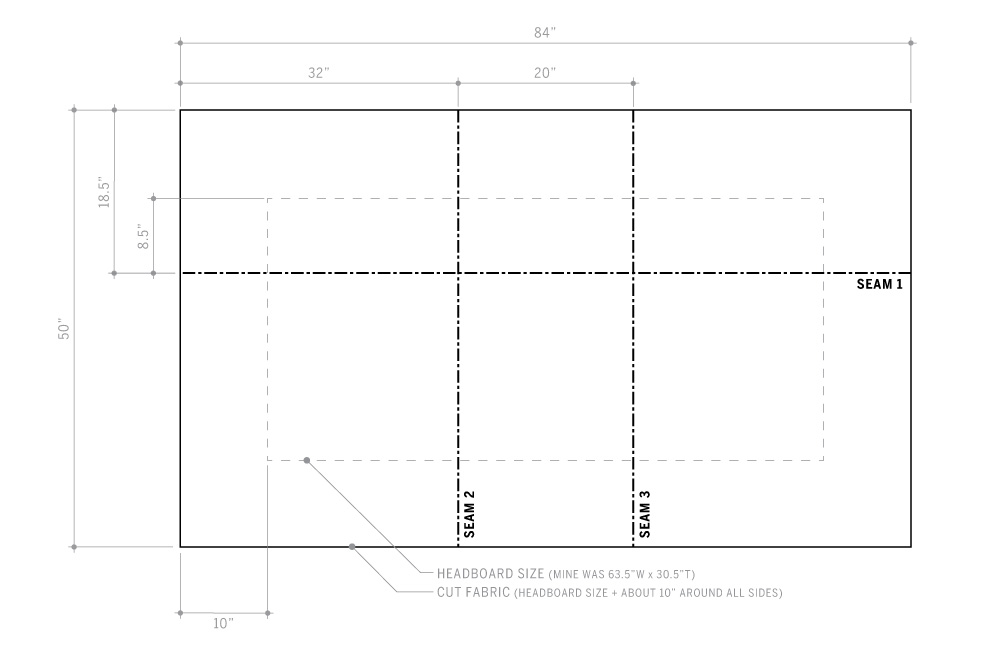
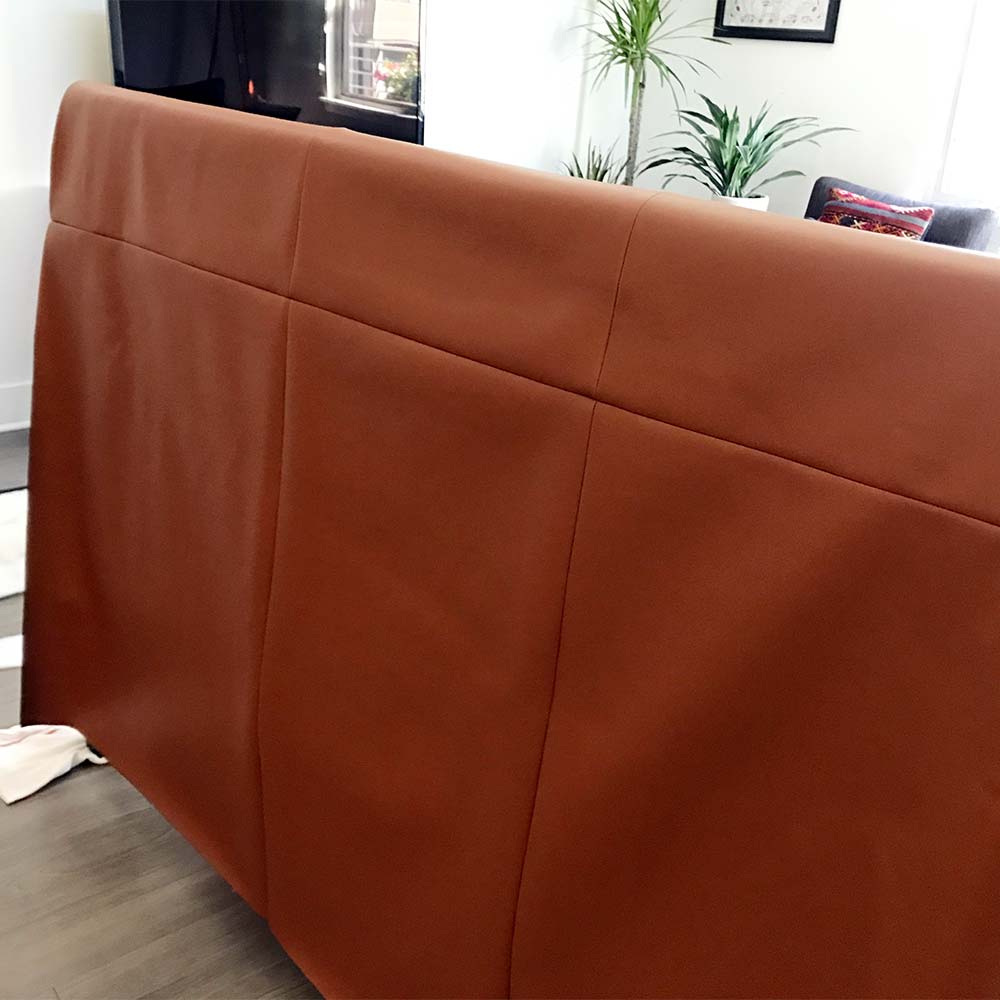
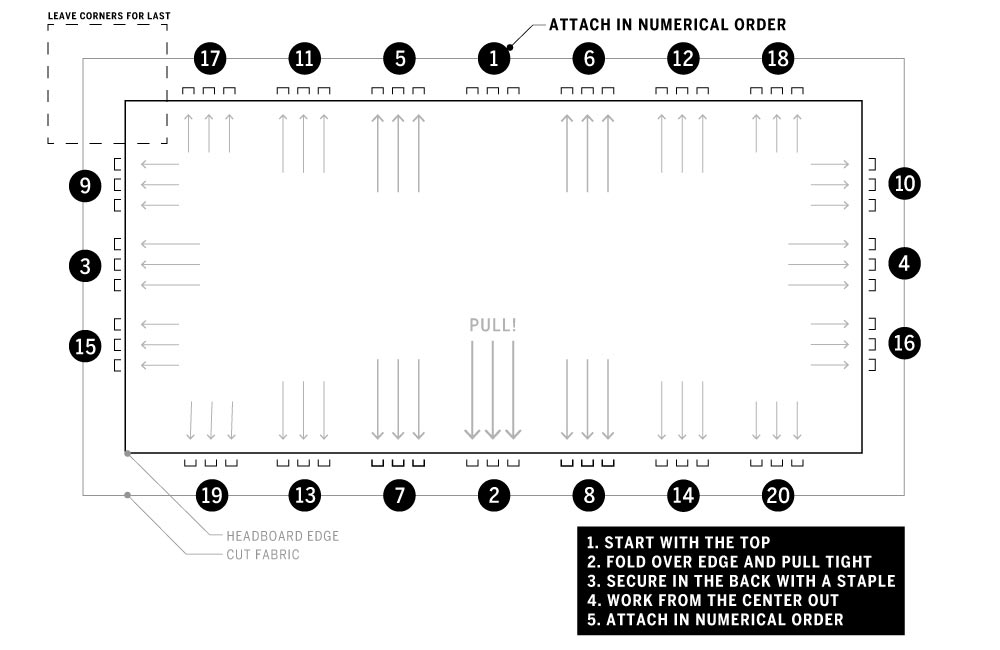
If you noticed, the inspiration headboard has leather panels which create 2 seams running vertically and one horizontally. The 5 buttons are then all placed along the horizontal seam. While I initially did not think I was going to add this nuance, once I got to this point and was feeling pretty bad ass I challenged myself to add the seams. (If you’ve already decided to not add panels feel free to skip ahead) Now it’s time to do a little math…or look at the diagram below.
When planning for my seam, I knew that I didn’t want it to sit too low since the buttons would then be covered by pillows. This took a little bit of experimenting against the wall of my bedroom and measuring my pillow height (yes, it’s neurotic but I did it!). For me, since my headboard is 46” tall that meant having my buttons 8.5” from the top.
With my buttons 8.5” from the top I sewed two panels together, running my full width, with the top one being approximately 15” giving me enough extra fabric (15″-8.5″= 6.5” extra) to pull around the top edge and attach to the back. You can make your seam pattern how ever you’d like, just be sure to leave enough room to cover the sides! To make the vertical seams, I folded and sewed 2 seams that were 20” apart. See the diagram below for all the seam placements. Once all the seams are in, press them open with a hot iron.
 Pro tip– I like to do a lot of mini-tests with scrap fabric before sewing or ironing. Work out the kinks on your sewing machine, figure out the heat setting on your iron. It’s always easier to do it on scrap pieces and adjust before going straight to the final product.
Step 6
Once I had secured the batting I stood the headboard upright and planned where to place my buttons. Since the West Elm version was my inspiration I wanted to stick with 5 buttons across the middle running along my horizontal seam. Draping the fabric over at this point was very helpful to visualize the button placement.
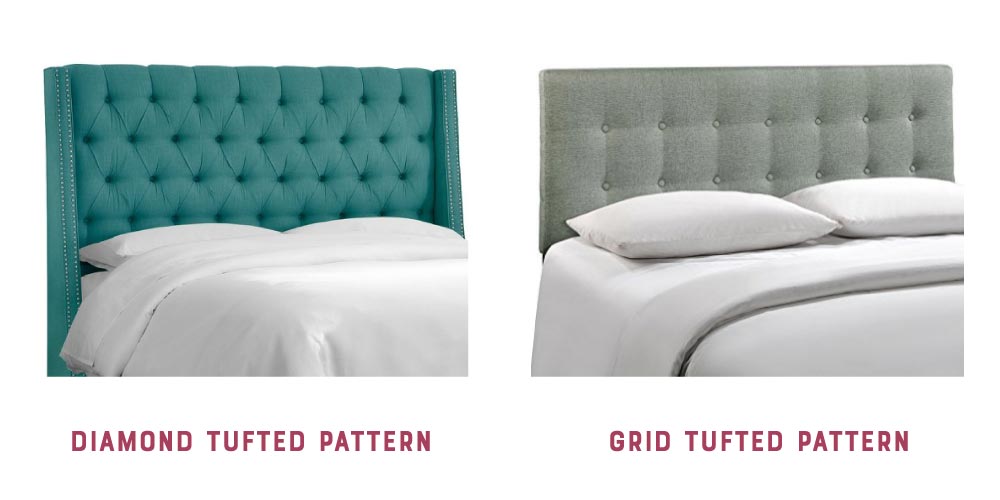
You could easily choose to do a diamond shape tuft or even 2 lines of buttons for a more modern look. That’s the great thing about pegboard being the base layer- all the holes are already drilled so the pattern is totally up to you. And at this point, if you’re covering a solid headboard instead, you’ll need to plan your button locations and drill holes through the back of the headboard at those locations.
Pro tip– Since your batting is only a base layer feel free to mark up all over it. I marked up 3 variations of button placement, took a minute to step back and ultimately decide what felt right.
Now that it’s finished, I do still love the placement when we’ve removed the decorative pillows but they could have gone a bit higher to allow me to get some more decorative pillows piled up (maybe it’s for the best!)
Step 7
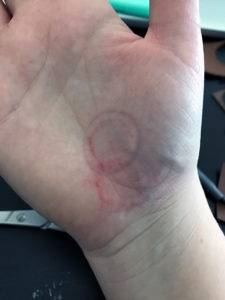
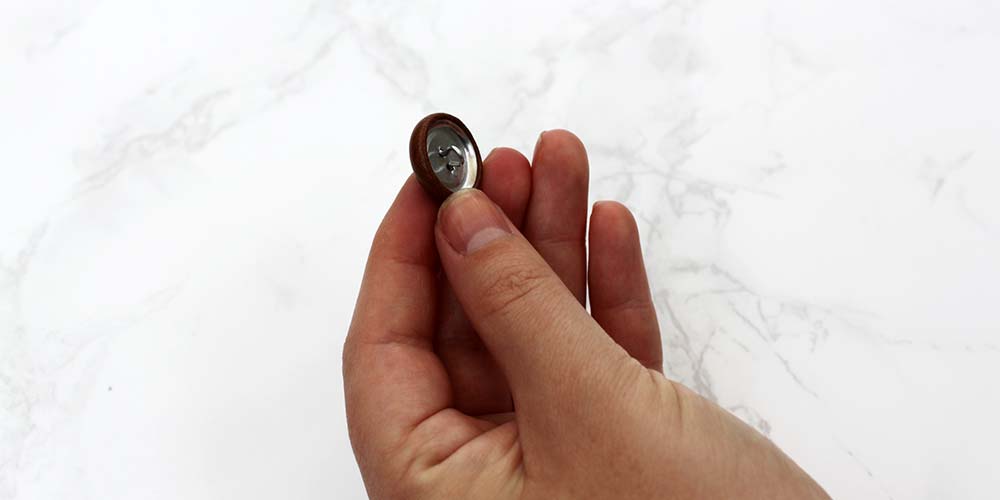
Making buttons—this could be an entire blog post to themselves. Now, this was hands down the hardest part of the project… not to scare you off! But really, it was HARD. Check out how my hand was looking post buttons.
The button kit will come with not enough instructions and not many pieces.
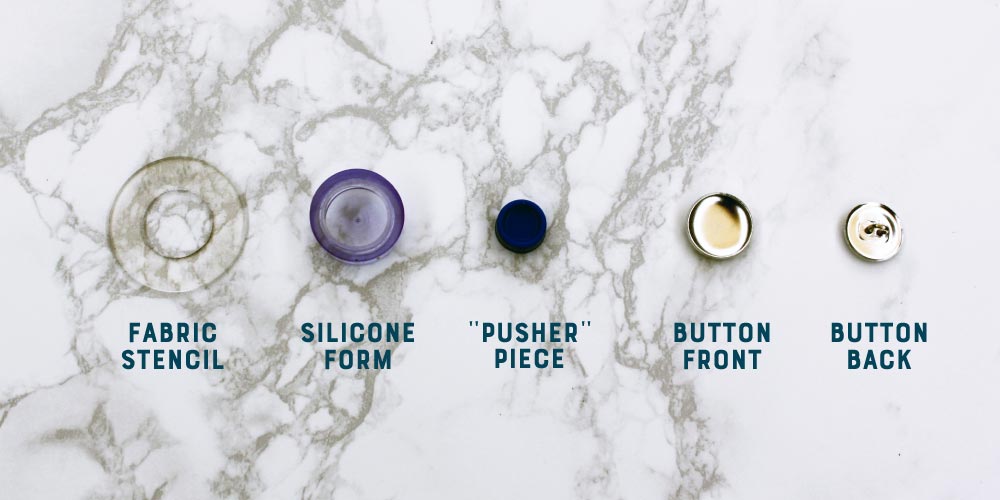
- Use the fabric stencil to cut out a piece of fabric the correct size.
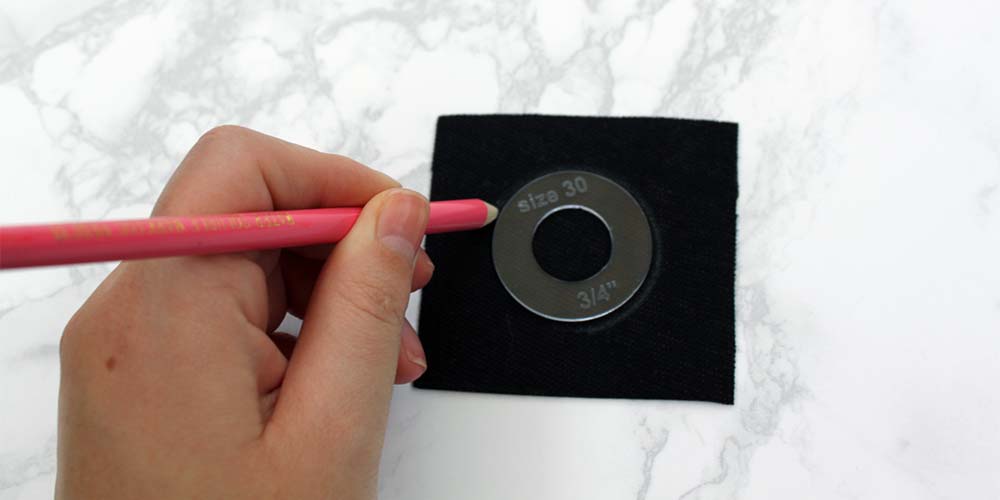
- The goal here is to wrap your cut fabric circle around the curved button front and squish that face down into the silicone form. Pro tip– On the stencil, the outside circle is the size of fabric you need but the inside circle shows you what will be on the button face. Important if you are working with patterns!
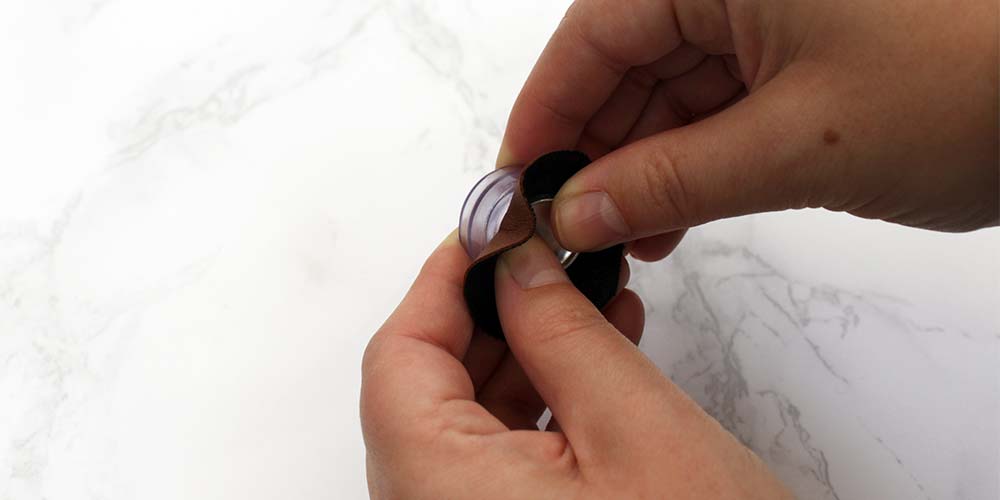
- Once that is done, you gather the excess fabric, mash it into the concave back and hold it shut with the back of the button.
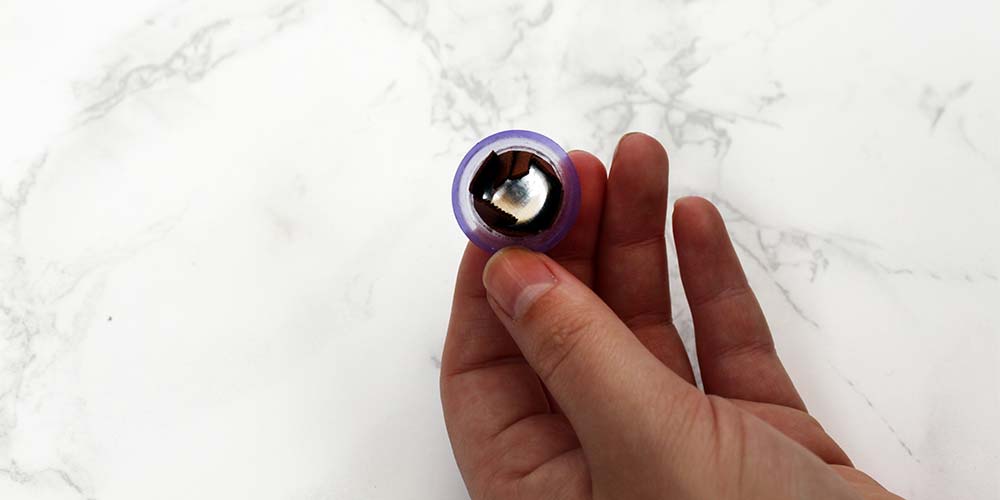
- The only way you can do this though is to use the pusher piece against the back of the button to apply enough force to sandwich it all together.

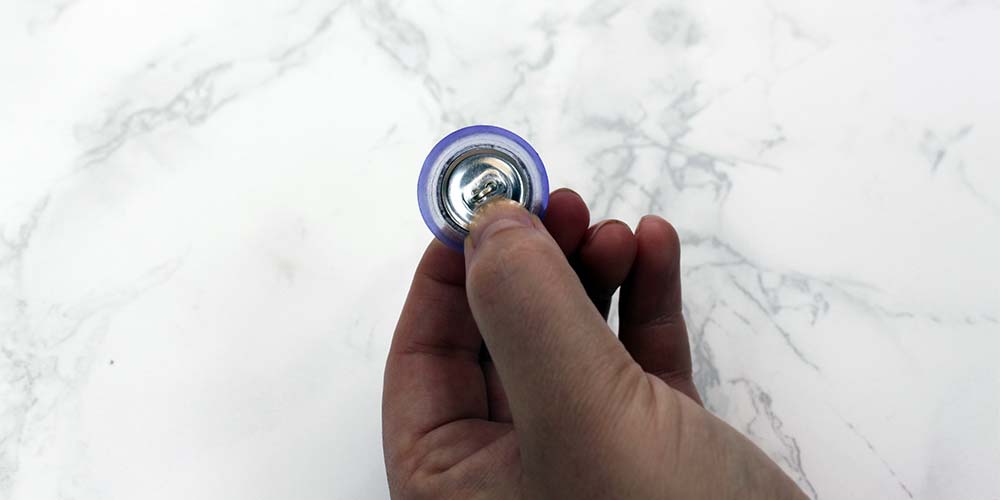
- After much struggle, it’s magically a button.
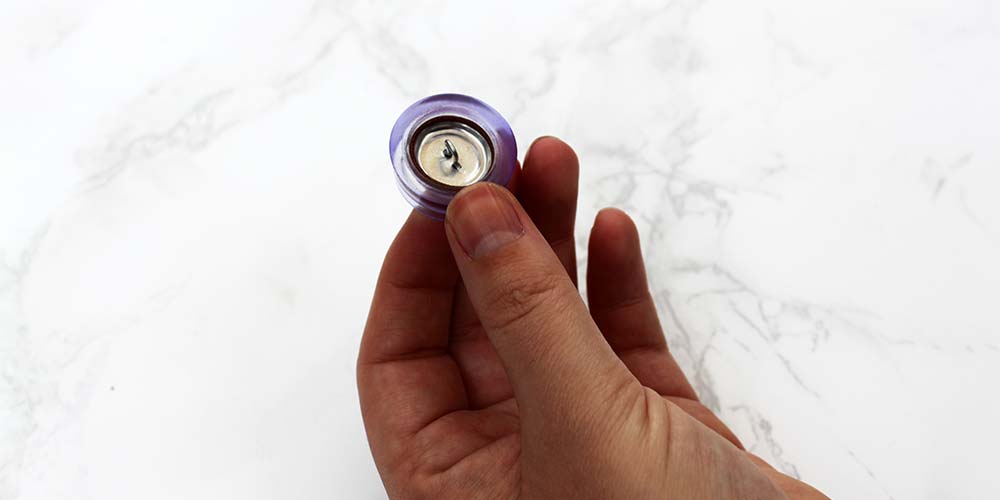
If this sounds like a Game of Thrones level mental game, IT IS. This shit is hard. But give yourself time, maybe a glass of wine, and you CAN make all the buttons. I believe in you! I also looked for a button set meant specifically for upholstery fabric and came up empty. If any of you know of one, please please let us know!
Step 8
If you’ve decided to use a flat piece of fabric and not seam it, lay it on the face of your headboard (you can tack it down with the spray adhesive) and start pulling the excess taut around the edges and securing in the back with staples. Make sure to work a little bit on each side so that you are evenly pulling the fabric in each direction. I like to work from the center out and definitely leave the corners for last.
However, if you did seam your fabric it is a slightly harder since the seams will need to stay level and will ultimately affect your button placement. Therefore, before I started attaching the fabric, I loosely secured 2 buttons in their correct locations to hold the fabric in the right spot while I pulled it taut. To attach the buttons, thread floral wire through back of the buttons and an upholstery needle and slowly push through the leather face. This should be relatively easy since it is going through the seam. Once you have pushed through the leather the batting and foam should be no issue. Fish the needle through until you come out one of the pegboard holes in the back. Now you can loosely twist the wire in the back to secure the buttons.
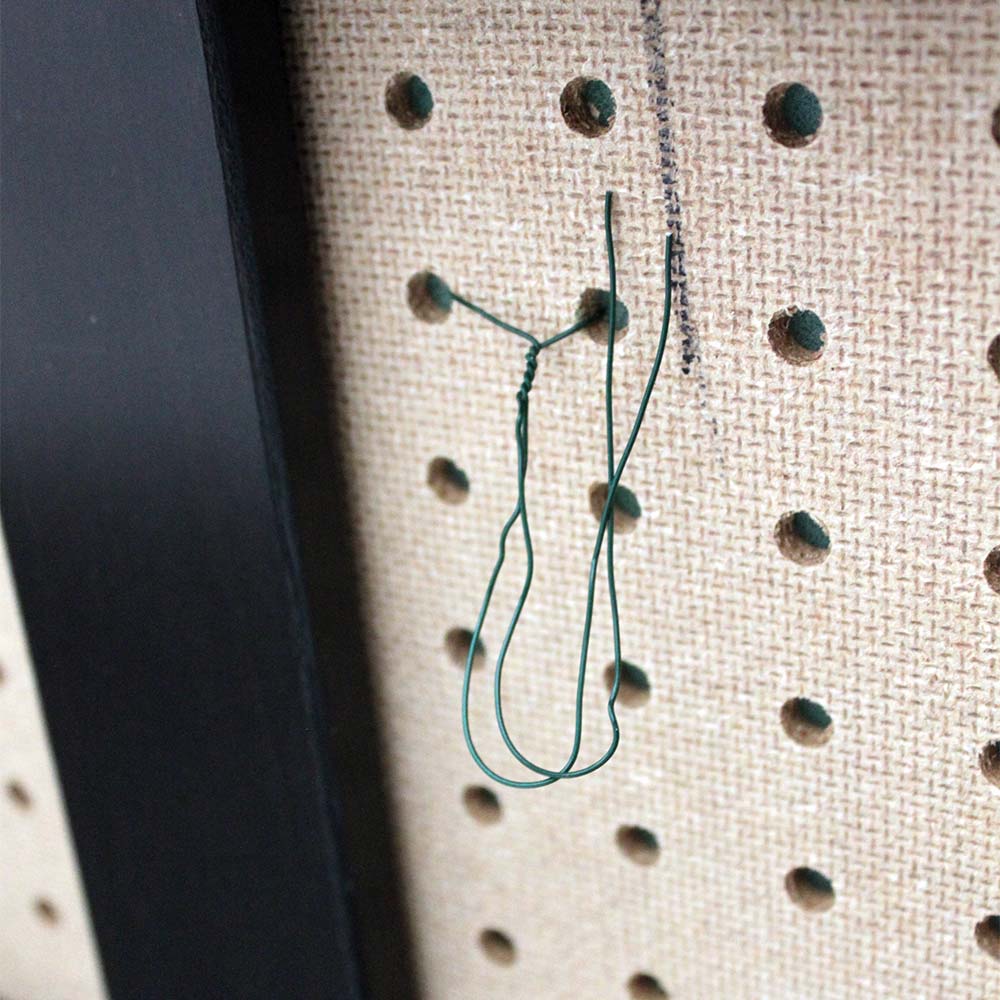
Alternate– You could also use upholstery thread to attach the buttons but after a few tests (told you I like testing things!) the wire felt the most secure and let me really pull the buttons tight at the end and get a nice tufting effect.
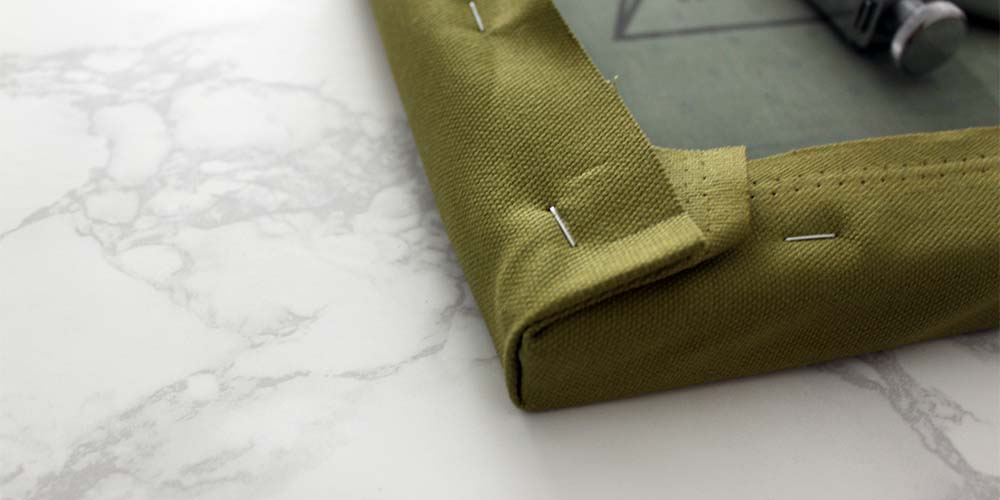
Once your two buttons are in place follow the diagram above to attach all the fabric taut all the way around, leaving the corners for last.
Step 9
While the corners look daunting, they really are not. We just need to cover the order in which to fold and secure. (As demonstrated with my scrap fabric and screen)
At this point, all the sides should be well secured with fabric left loose at the corners.
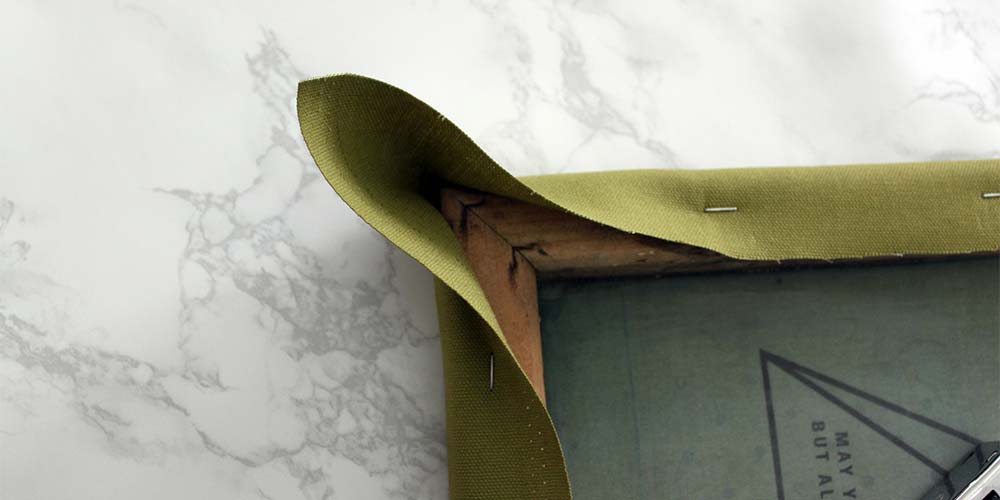
First, pull the fabric from the side up and over the top.

Secure with one staple right into the top.
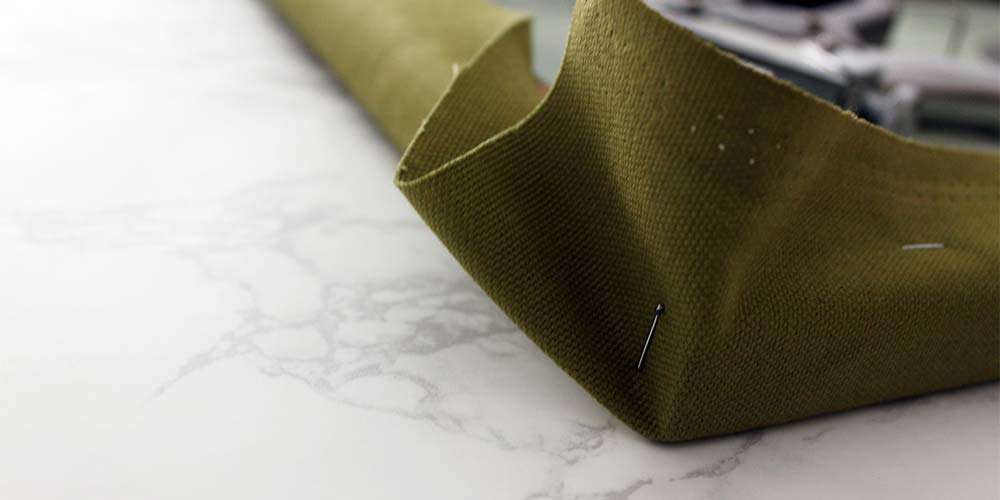
Now you will have almost a triangle of fabric. Fold the triangle down so that it creates a clean fold that runs along the corner of the headboard. And remember to experiment a few times folding it correctly before securing with staples.

Secure the fold with a staple.
Step 10
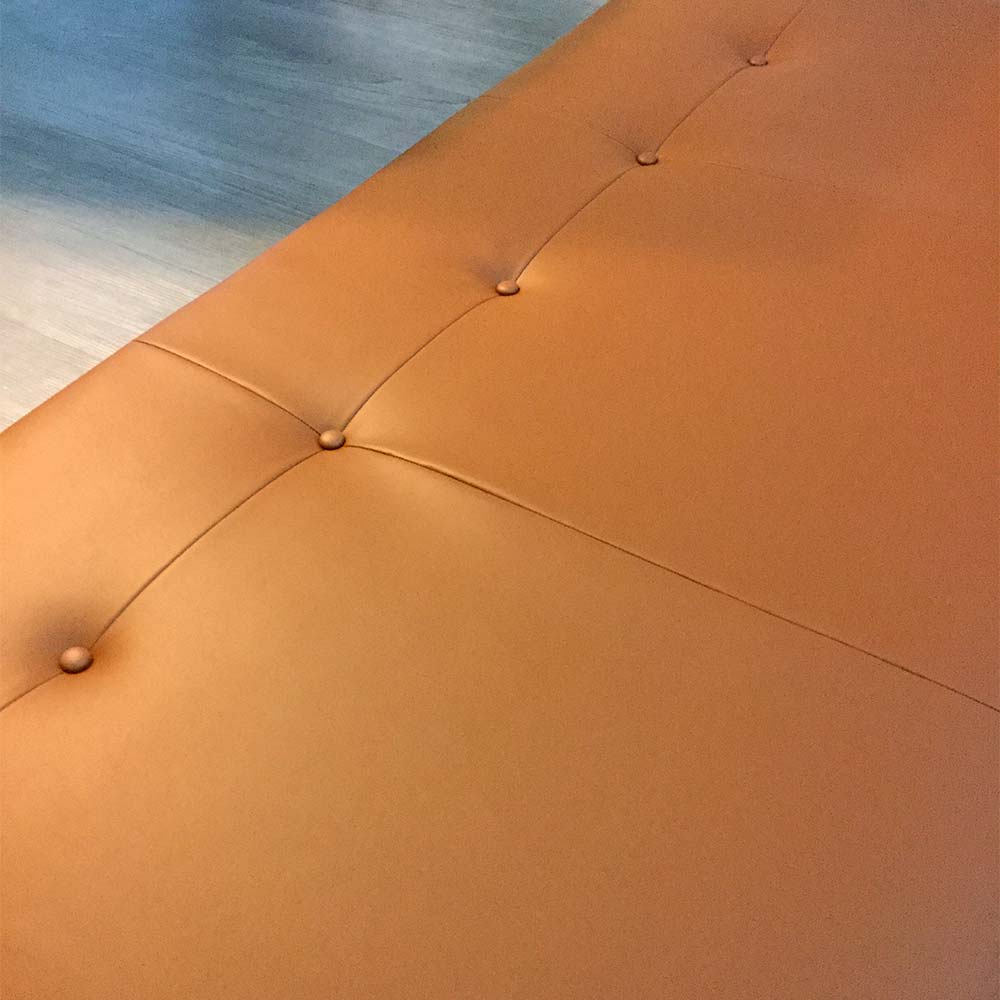
Following the same method as above, attach the rest of your buttons. I started with the two I already had loosely placed. At this point, you can really pull the wire from the back and create that tufting effect. How tight you pull and secure the buttons in the back determines the tufted depth. Measure and add the final 3 buttons using the same method as before.
And viola, DIY Leather Tufted Headboard! You’ve done it! Give yourself a pat on the back and pour yourself that second glass of wine. Kudos!
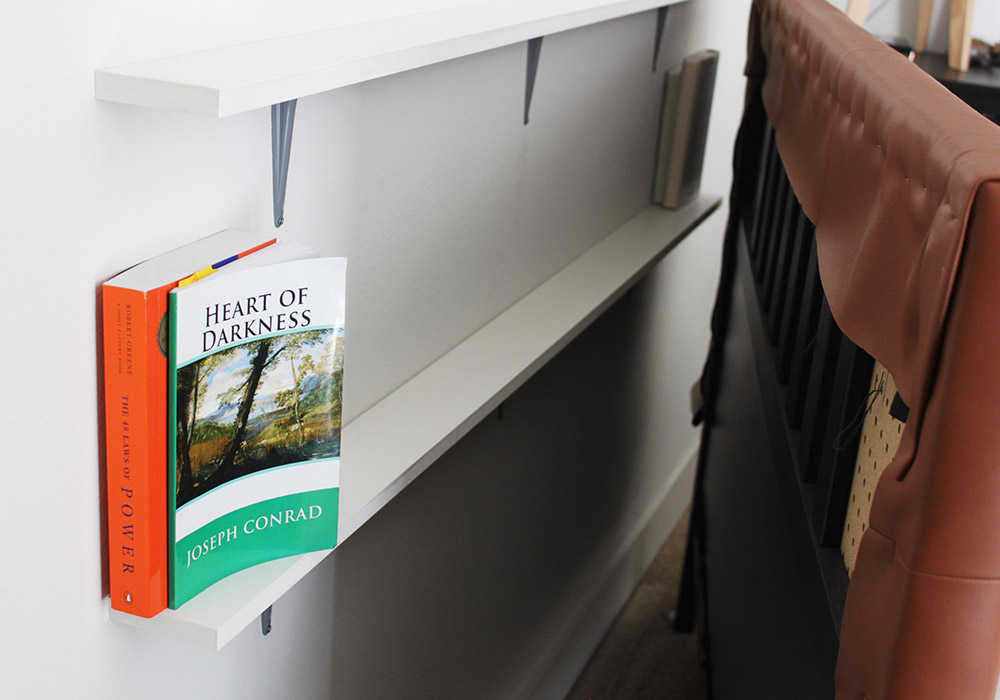
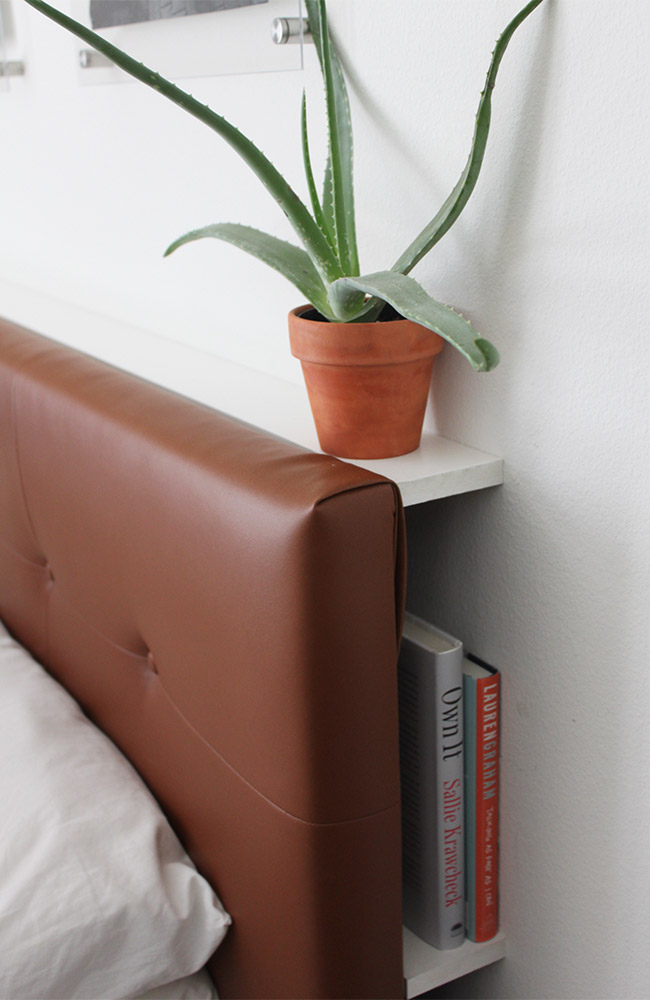
I decided to add two simple 3″ shelves behind the bed for storage since the room isn’t wide enough for bedside tables.
What do you guys think? Anything you’d change?