The best part of warmer weather is porch drinking, and the best part of porch drinking is porch swings (also pink wine). While our porch has a sitting area off to the right, the left side was a big gaping hole just begging for a DIY hanging daybed.

Ideally, I wanted this to feel like an actual daybed situation, but most of the ones I was finding online to purchase were out of the budget. So instead, I decided to build my own.
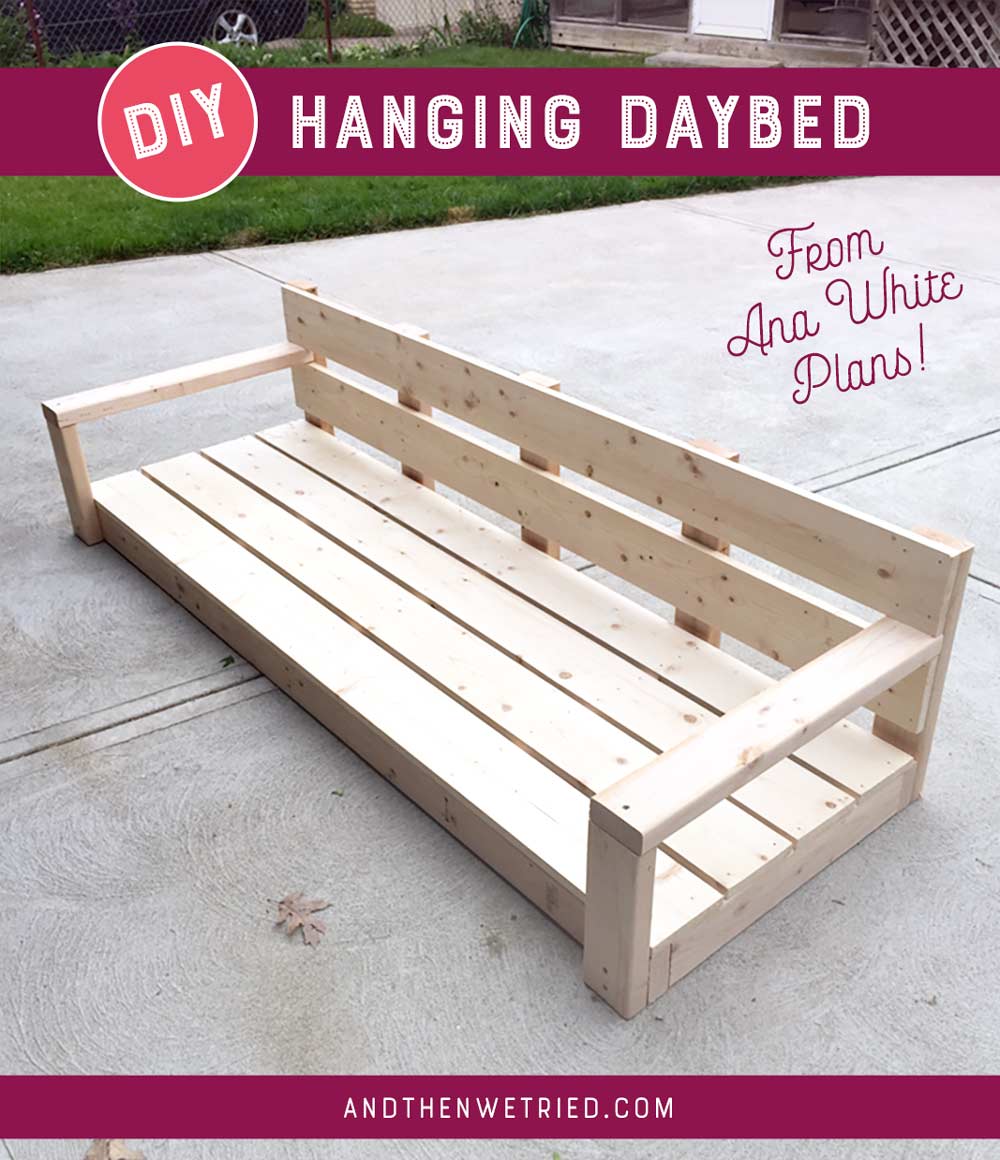
A typical porch swing is usually four or five feet wide, and somewhere around 18 to 20 inches deep, but I was looking for something more substantial than that. I came across this building plan for a DIY hanging daybed from (genius) Ana White, and the directions seemed to match my limited skills, so I got to work.
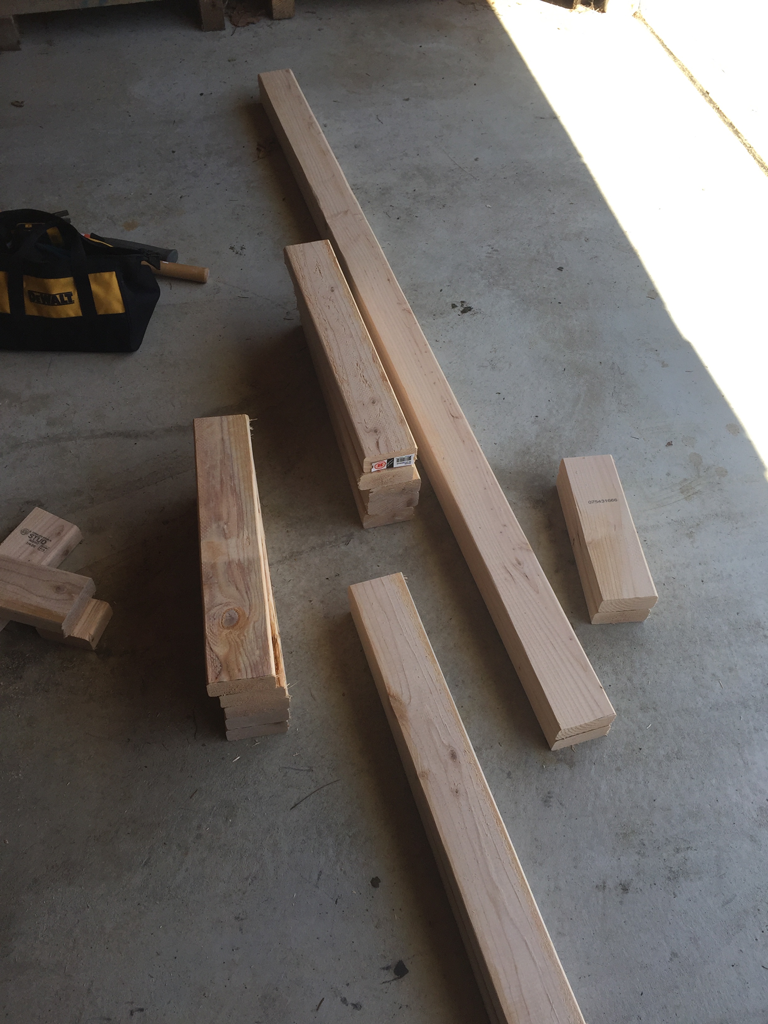
The lumber, nails, screws, and eye hooks came to just over $60 at Home Depot. I was able to follow the directions really easily and did the assembly by myself. It was pretty straightforward, but I snapped some in progress pics to give you an idea of the process.
I followed the shopping list then made cuts with my dad’s miter saw.
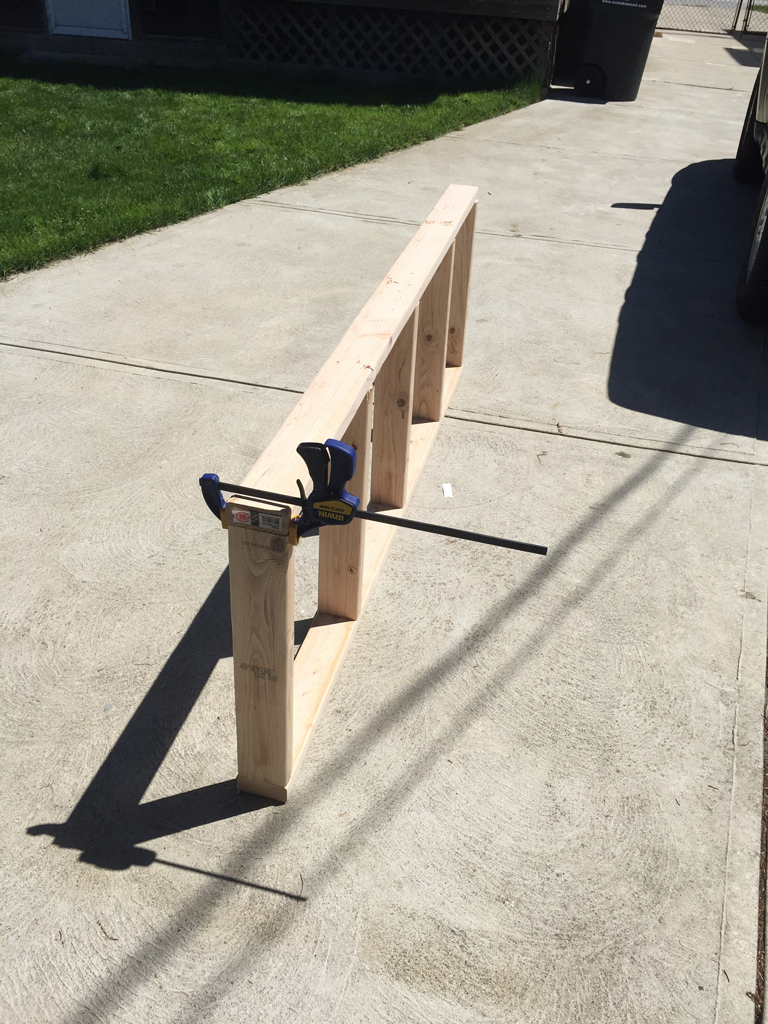
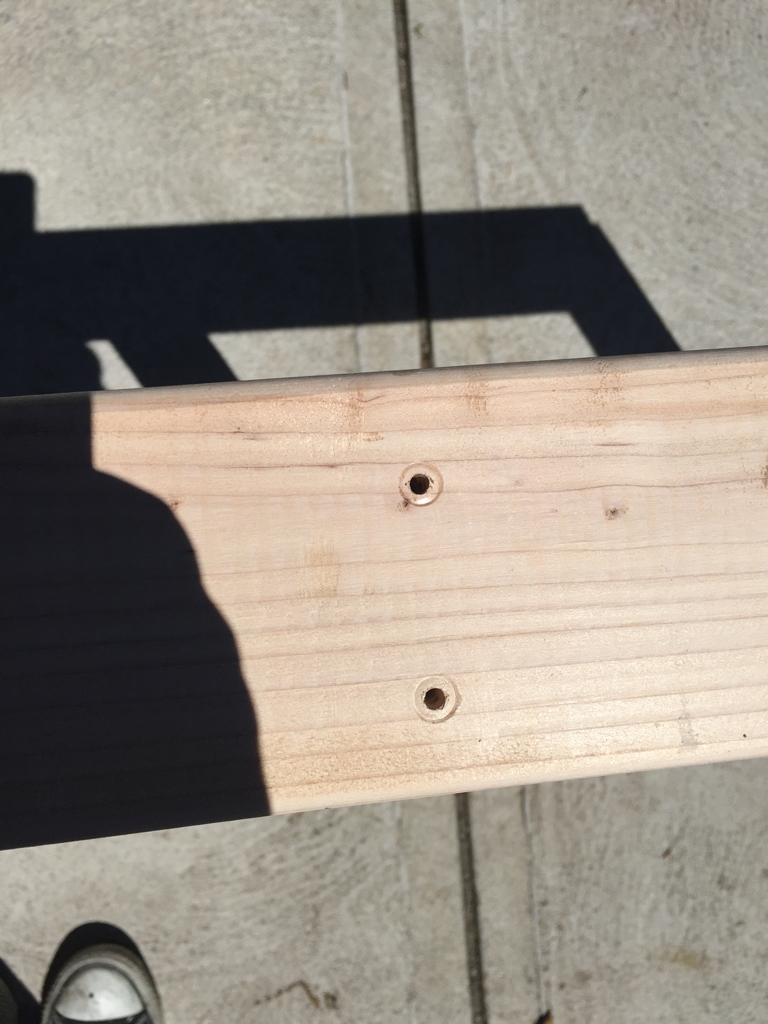
Step one in Ana’s plan was to build the seat frame. I didn’t use pocket holes, just predrilled and countersunk the screws. I wood glued one side of the frame while it was on its side so that things would (hopefully) stay square on my uneven driveway.
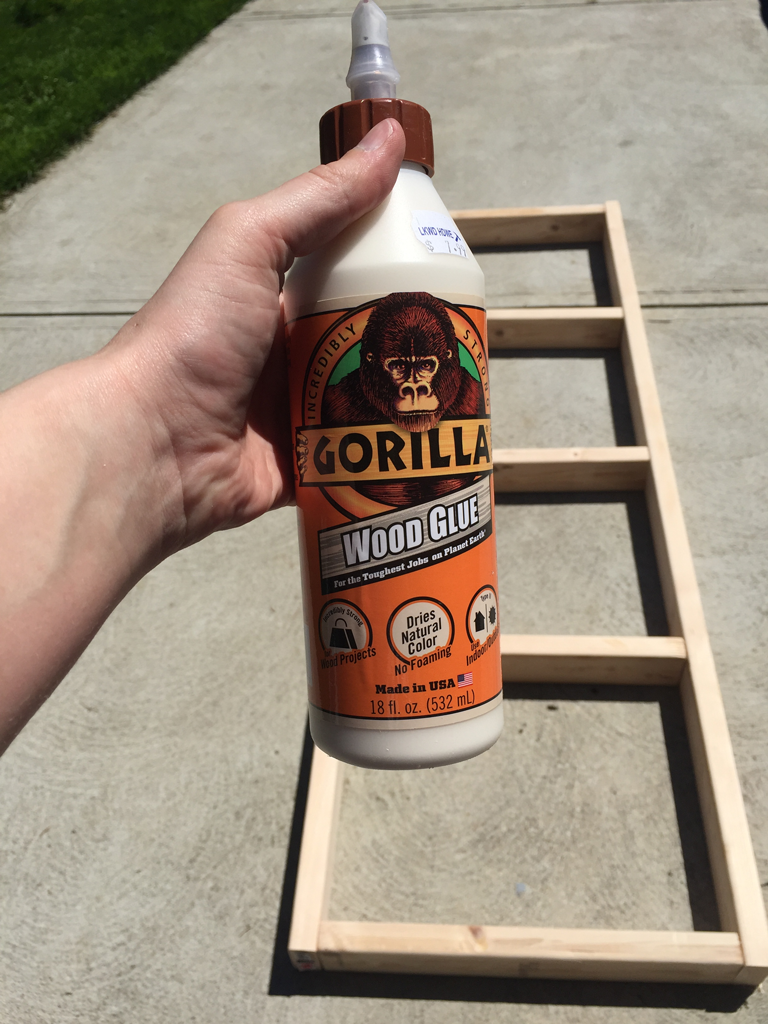
I used the one clamp I could find to glue on the other side of the frame and then predrill and countersink the screws.

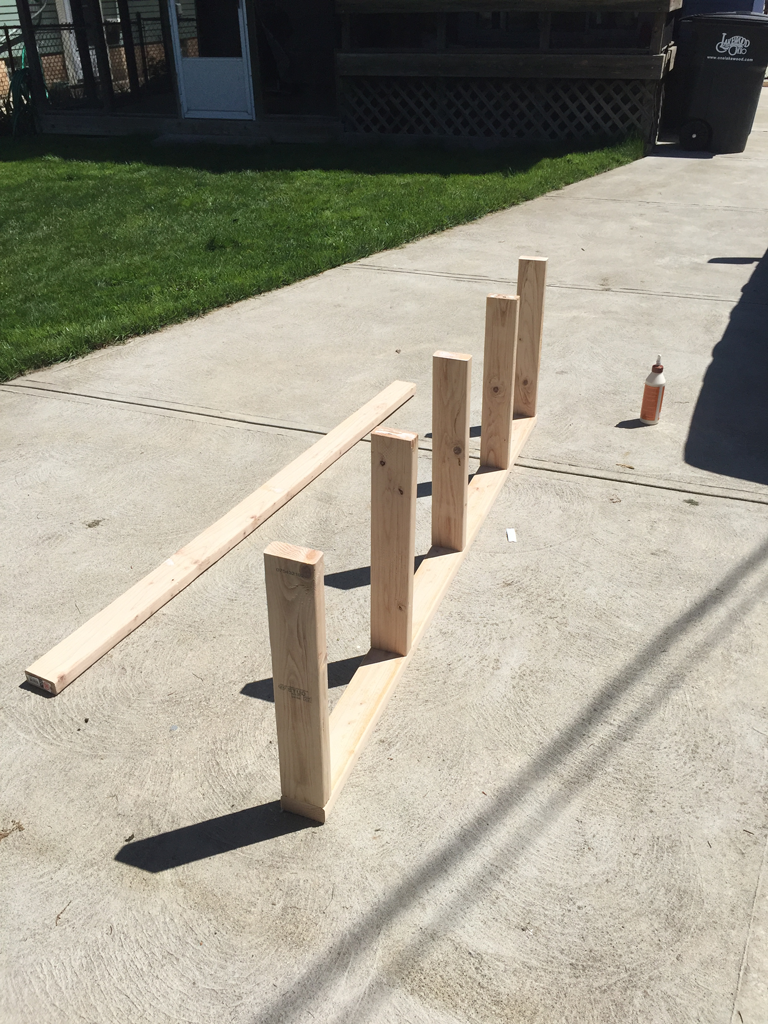
Then I moved to step two (and moved the project into the garage) and again wood glued, predrilled holes, and countersank the screws to attach the back supports.
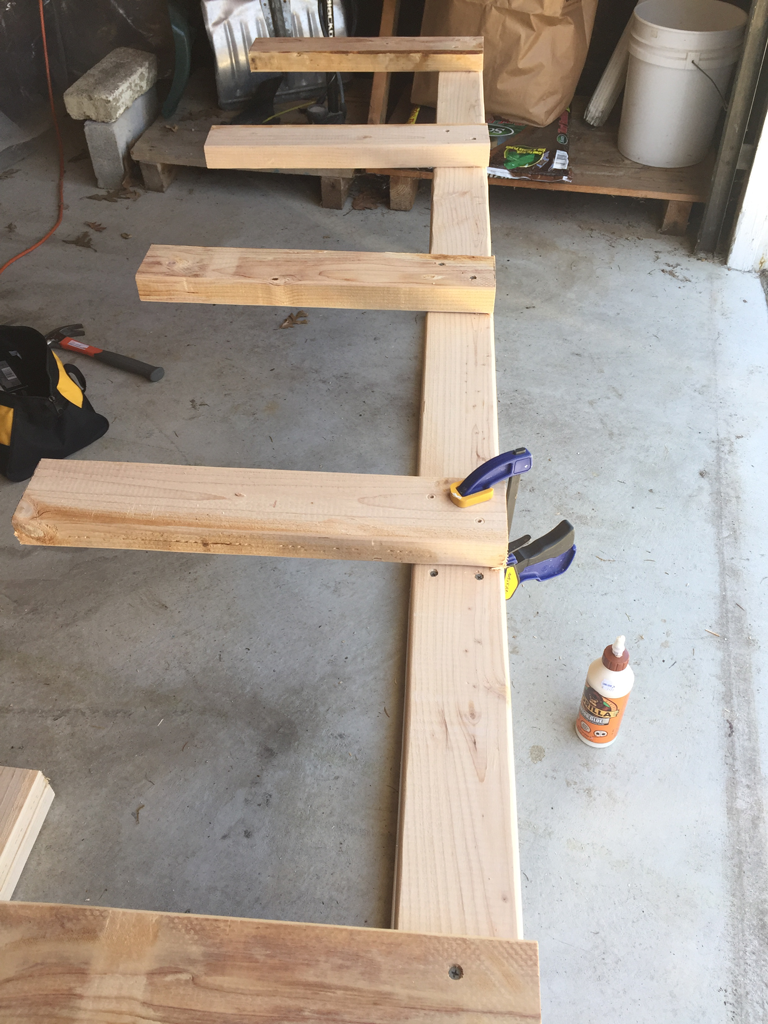
Steps three and four, armrest supports, were easy enough from there. I attempted to clamp these pieces together when using the wood glue, but the angles were a little weird for the clamp, so I just predrilled and countersunk the screws and hoped for the best.
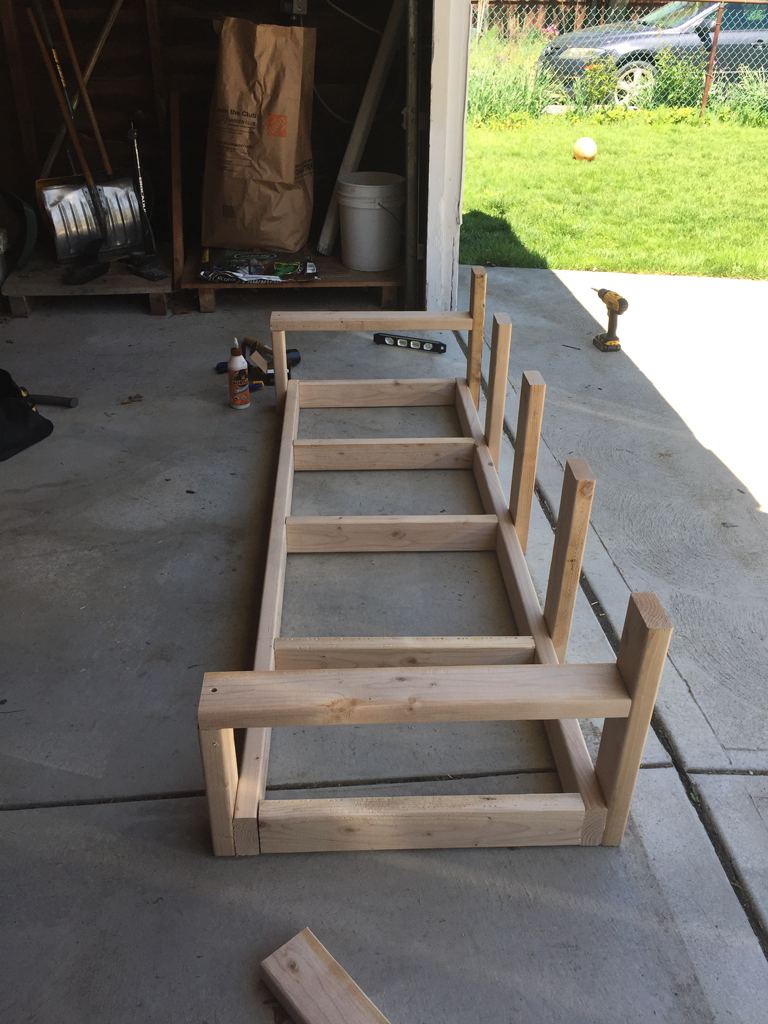
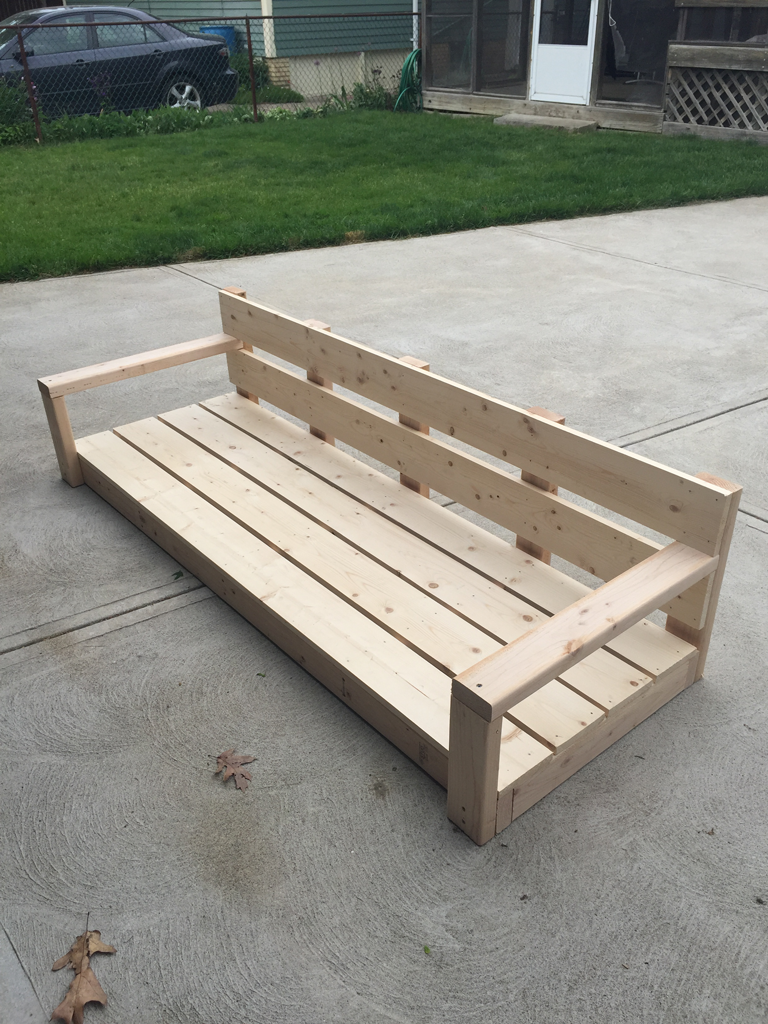
From there I followed steps five and six in Ana’s plan to nail the back and seat boards into place. And there you have it! A DIY hanging daybed!
The only thing I would change would be the spacing on the seat boards. It doesn’t look bad, but my back board doesn’t line up with the back supports as I would have liked. I followed Ana’s directions, starting at the front and leaving ½” gaps between boards. Instead, I wish I had lined up the front and back boards with the front and back of the frame and then evenly spaced the middle boards from there. But, hopefully, once I have a cushion on there no one will even notice!
From getting the boards cut to size to assembling everything, this whole project took me about three hours by myself. I’m sure it would be a little quicker with another set of hands, but it’s definitely doable as a solo afternoon project!
I was originally hoping to stain the daybed, but between the wood not exactly being furniture grade and all of the wood glue I’ll be using to fill screw holes, I don’t think stain is realistic. Instead, I’ll be painting it, but I can’t decide on a color! Anyone have any ideas? Let me know in the comments!
Check back next week to see the full DIY hanging daybed reveal! I’m making my own seat cushion (hopefully it turns out as well as Robin’s did!) as well as a big pillow to cozy things up. I can’t wait to hang this bad boy up and start enjoying some pink wine on the porch.