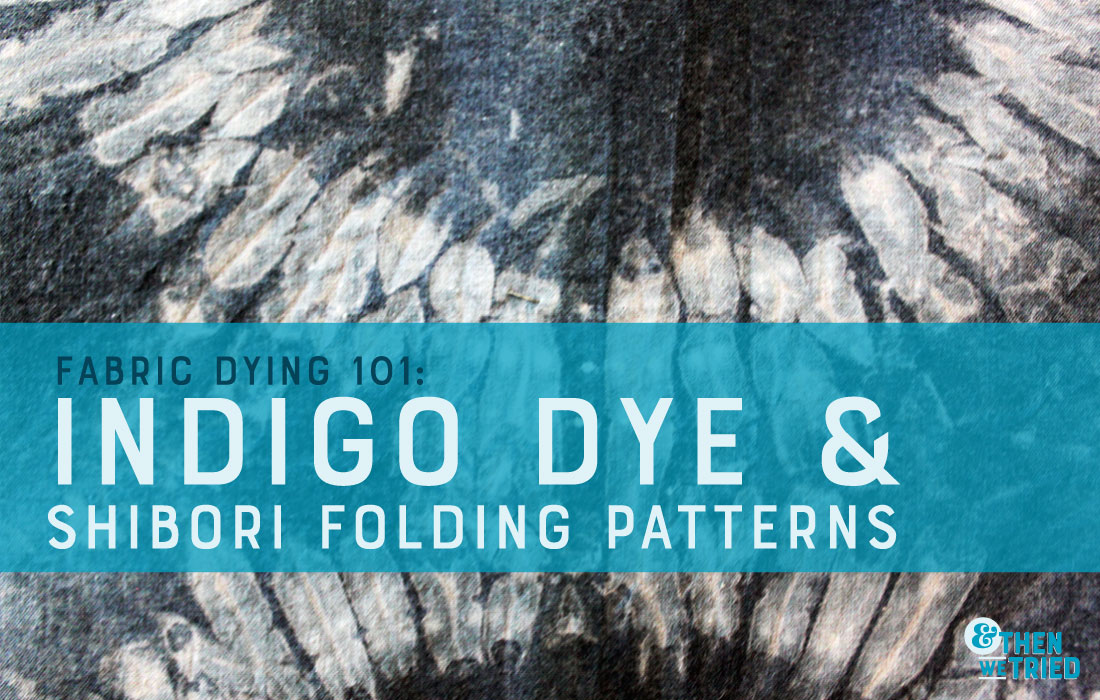
If you went online in the summer of 2016, you’ve inevitably seen Shibori dye and the indigo everything as a result. Shibori is essentially tie-dye but using only indigo instead of the rainbow of colors. Which makes it pretty much foolproof since there is no risk of accidentally using too many colors and dying your shirt poop brown (we’ve all been there). The kits are easy to find online and the real fun comes in with trying all the different Shibori folding patterns to get one of a kind results.
Our Shibori history
Last year Shibori dying was blowing up on the internet and Robin and I both bought indigo dye kits to start dying things. I had a little 4th of July party and set up a Shibori station with tea towels and tote bags as a fun craft. Then, after the party, I washed all the stuff and forgot to give anyone their creations. Sorry, friends. Once I dumped out the dye bucket, I ordered another Indigo dye kit so I’d be prepared and it had been sitting with my craft supplies for the past year.
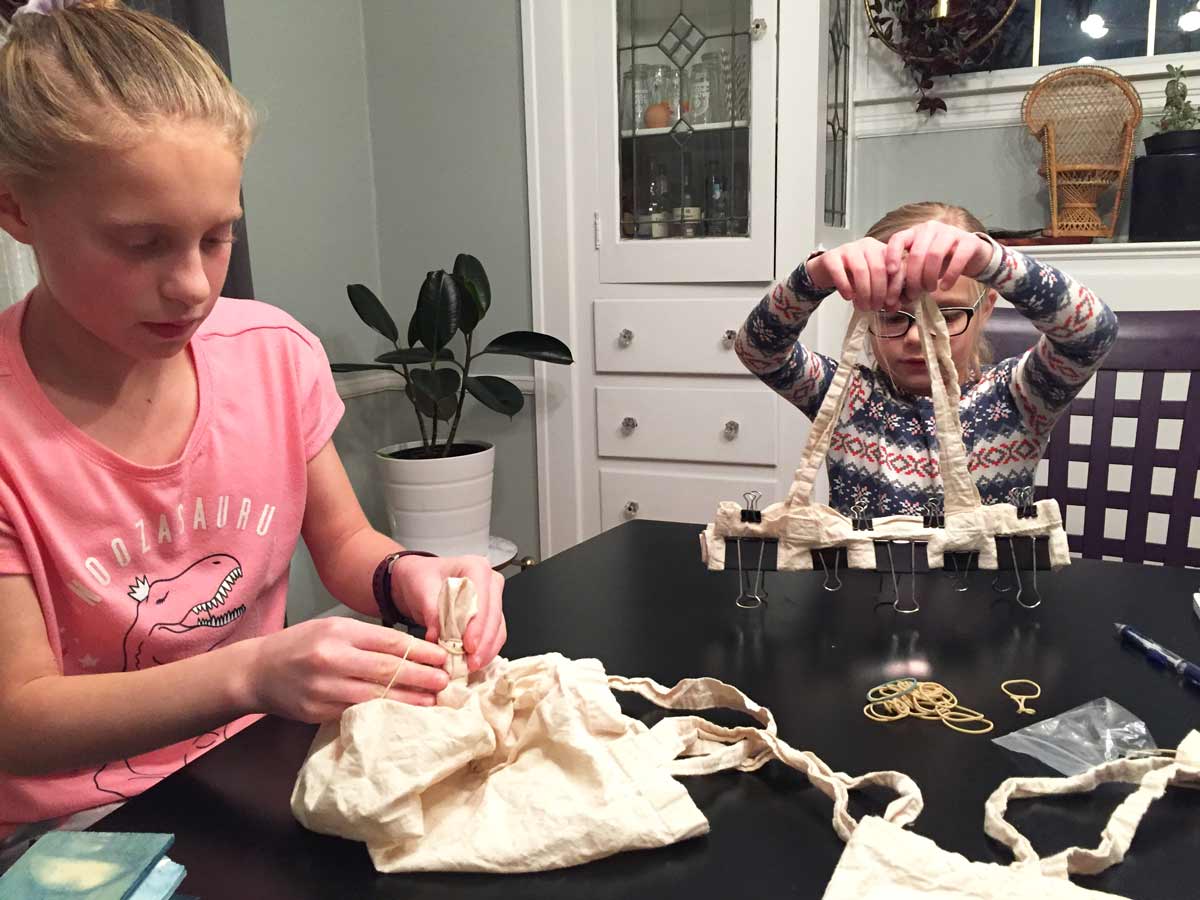
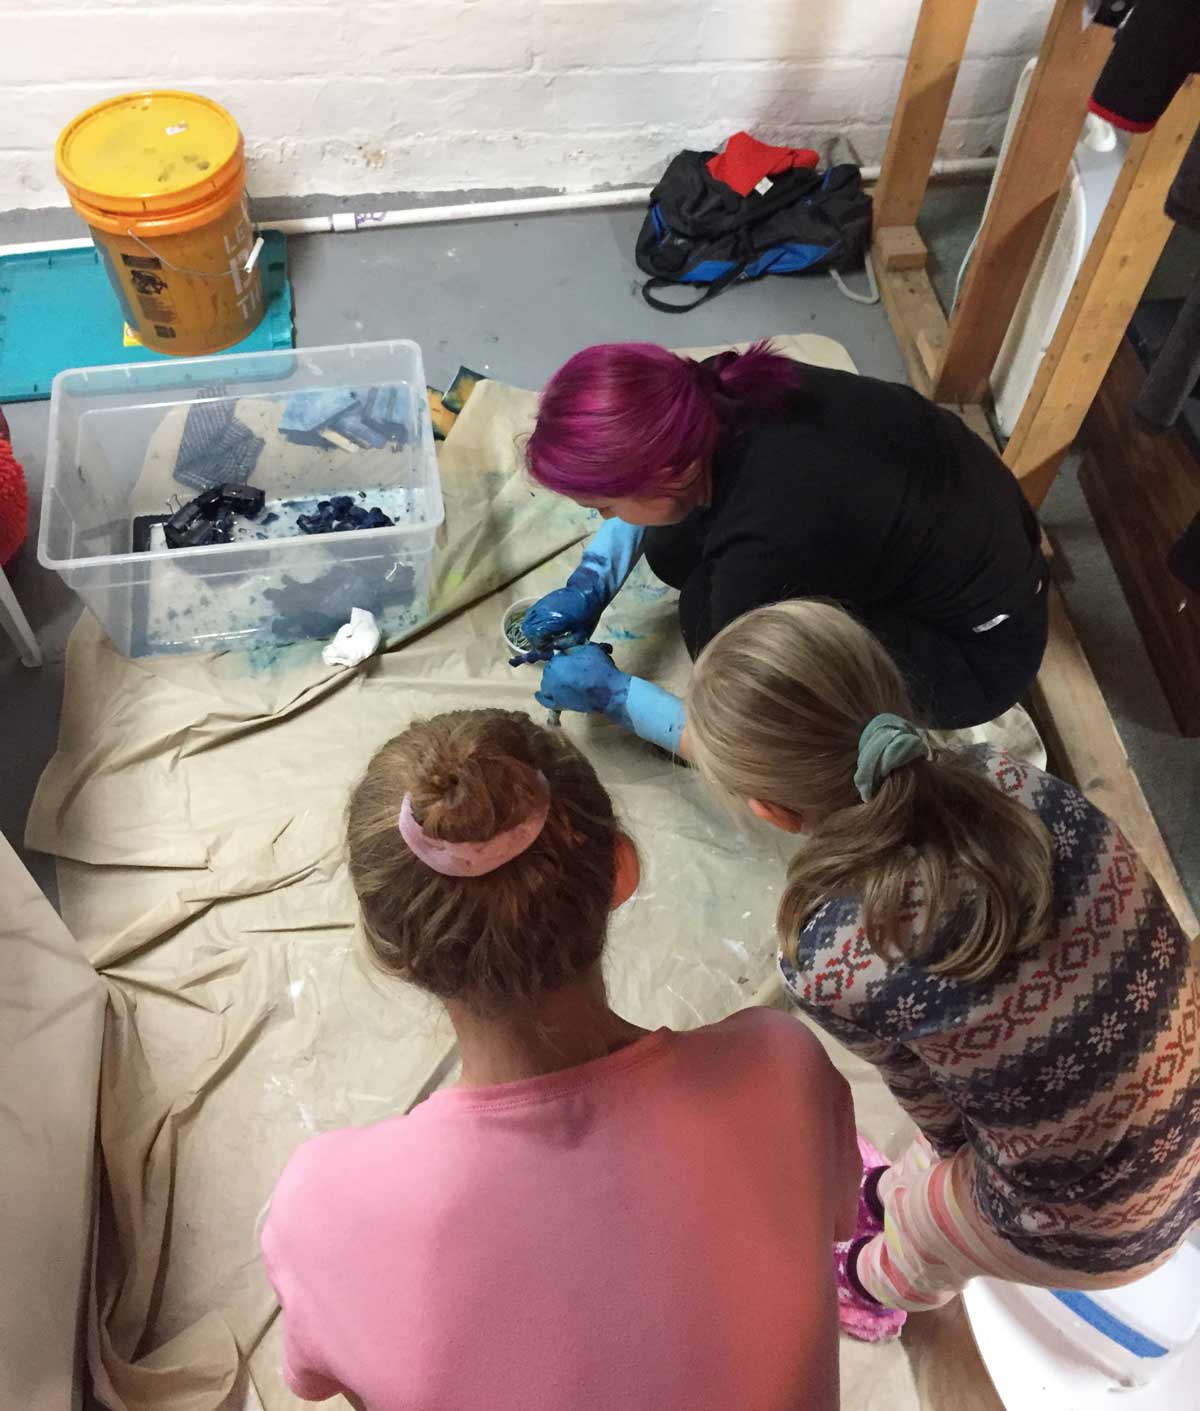
Cut to Christmas this year. As a self-proclaimed debt monster, I was focusing on hand making most of my gifts this year, which was a win-win because while I was spending hours and hours making stuff, I wasn’t spending those hours burning money. YAY! I planned to make my Grandma a couple of Shibori dyed tea towels and dug through my piles of craft supplies to find the Indigo kit. Thankfully, I learned from this same Grandma to never throw anything away, so I still had the buckets and wood blocks from the 4th of July dye session and I was ready to roll. Once I finished making my Christmas presents, I had my cousins over for a sleepover and we dyed tote bags. They are seven and ten years old and they LOVED this project.
How to Shibori Dye
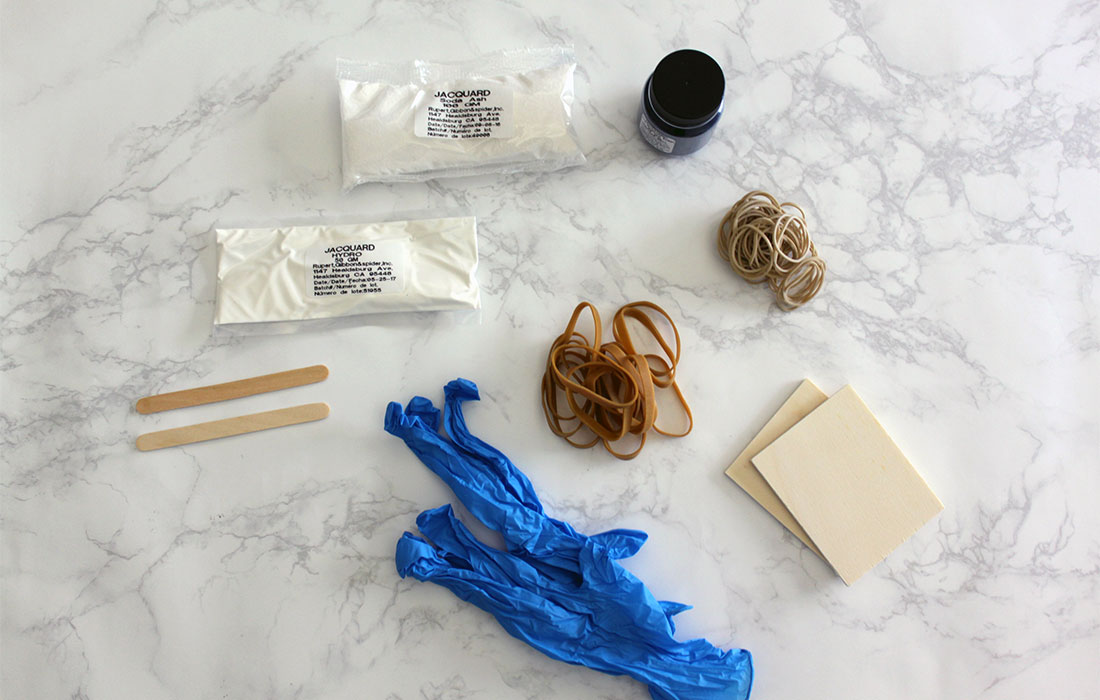
Supplies:
- Indigo Dye Kit
- 5 Gallon Bucket
- Second bucket/plastic tub for water
- Wood dowel/scrap/ paint sticks for mixing
- Long gloves– the gloves that come with the kit are too short
Optional Extras:
- Rubber Bands– we like these with assorted dimensions
- Binder Clips– assorted dimensions for the win
- Clothespins
- String
- PVC Pipe
Our Favorite things to dye:
- Tea towels/ flour sack towels
- Tote bags
- Pillowcases
- Duvet covers
- White fabric
Setting up the buckets
You are going to want to give yourself some space here. If you’re able, this is great to set up on the lawn near a garden hose. Since I just did this in a Cleveland winter, it also works in a dark basement near a sink. For inside dyers, put a drop cloth on the floor for safety, and move anything you don’t want to get dyed out of the way. The kit comes with good instructions for mixing all the ingredients, but be careful not to get too aggressive stirring, you don’t want to mix too much air in since this causes the dye to oxidize. You’ll also need to set up the dye bath and let it sit for 30 minutes to an hour, so plan ahead. Use that extra time to try some of our favorite shibori folding patterns.
Shibori Folding Patterns
When folding your fabric remember that Shibori is based on a resist technique. Meaning, where the fabric is bound, clipped, or folded, will not be exposed to the dye and will remain white. The tighter the fold, the more white the fabric will remain. The looser the fold, the more indigo that will penetrate.
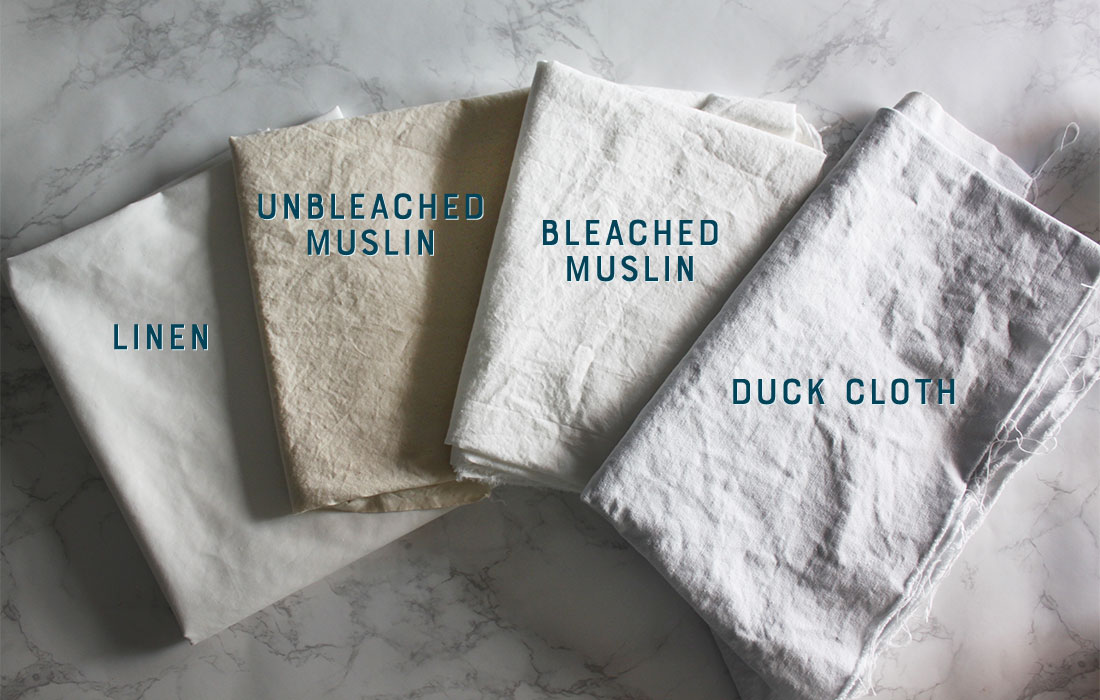
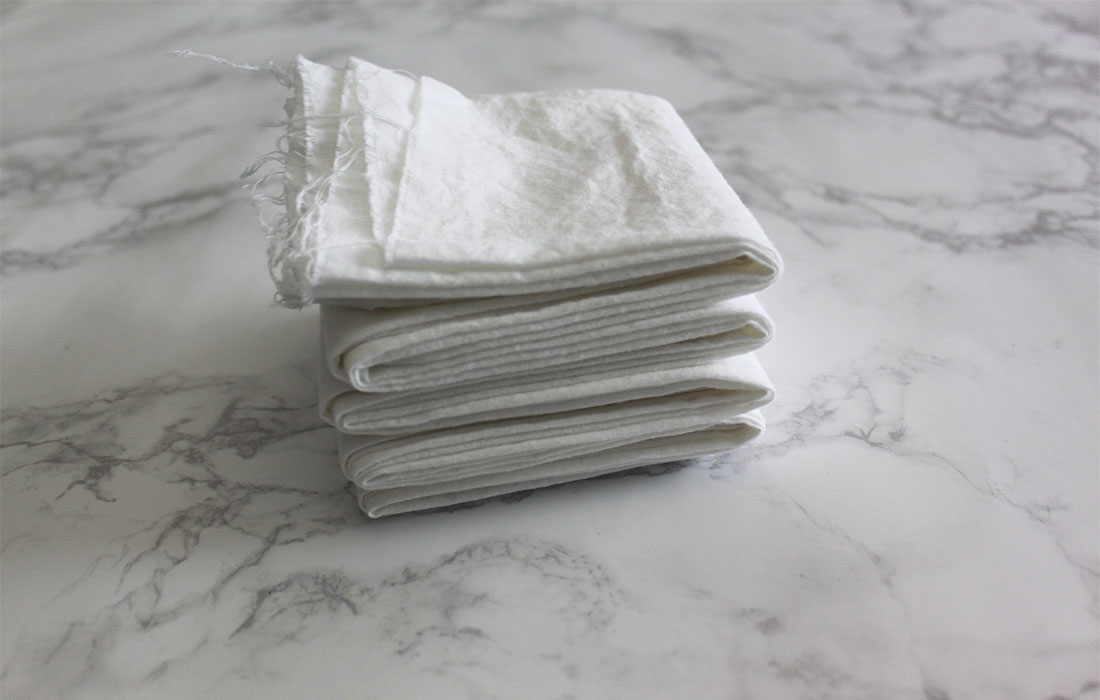
We used four different types of white fabric; linen, unbleached muslin, bleached muslin, and duck cloth. Traditional Shibori is done with silk but while we’re still experimenting let’s go with something a little more simple.
Tiny Rubberband Circles
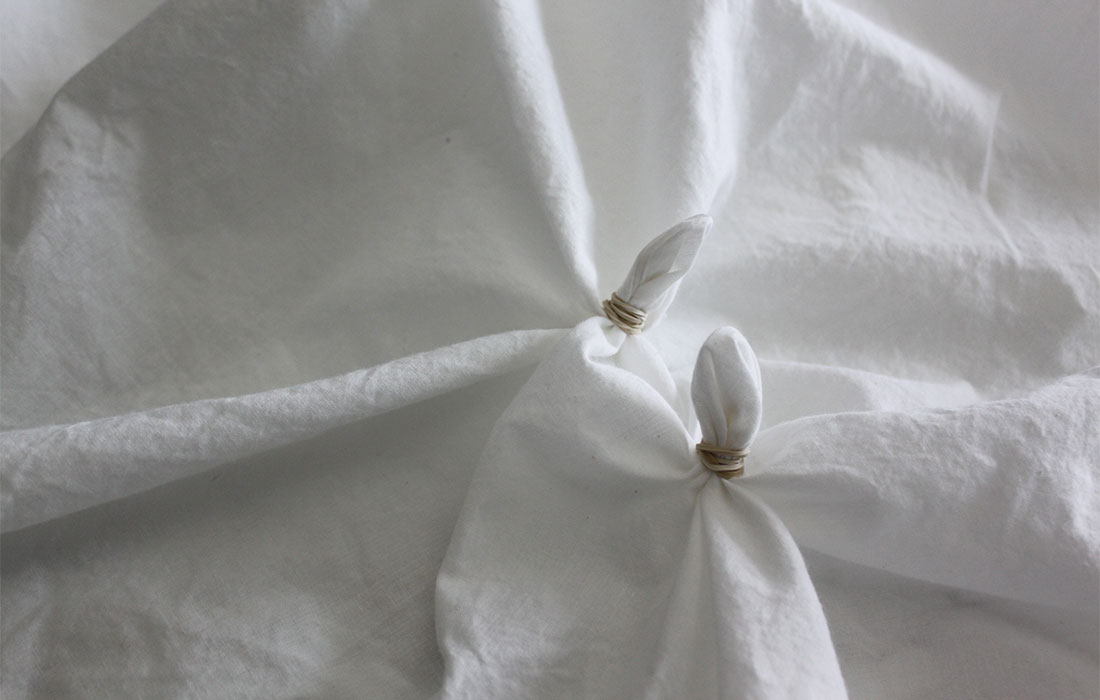
The easiest of the techniques is the rubber band circles, think summer camp tie-dye. It’s as simple as grabbing different areas and tying them off.
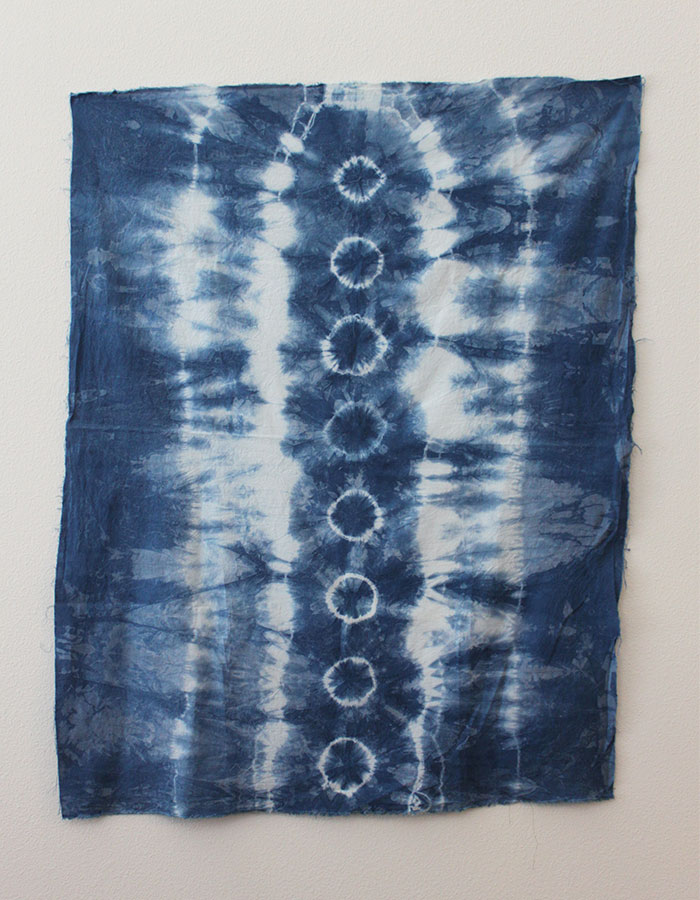
This is the finished look on bleached muslin. The white is super white and takes the dye great.
This pattern is made by arranging your tiny rubberband circles in a grid.
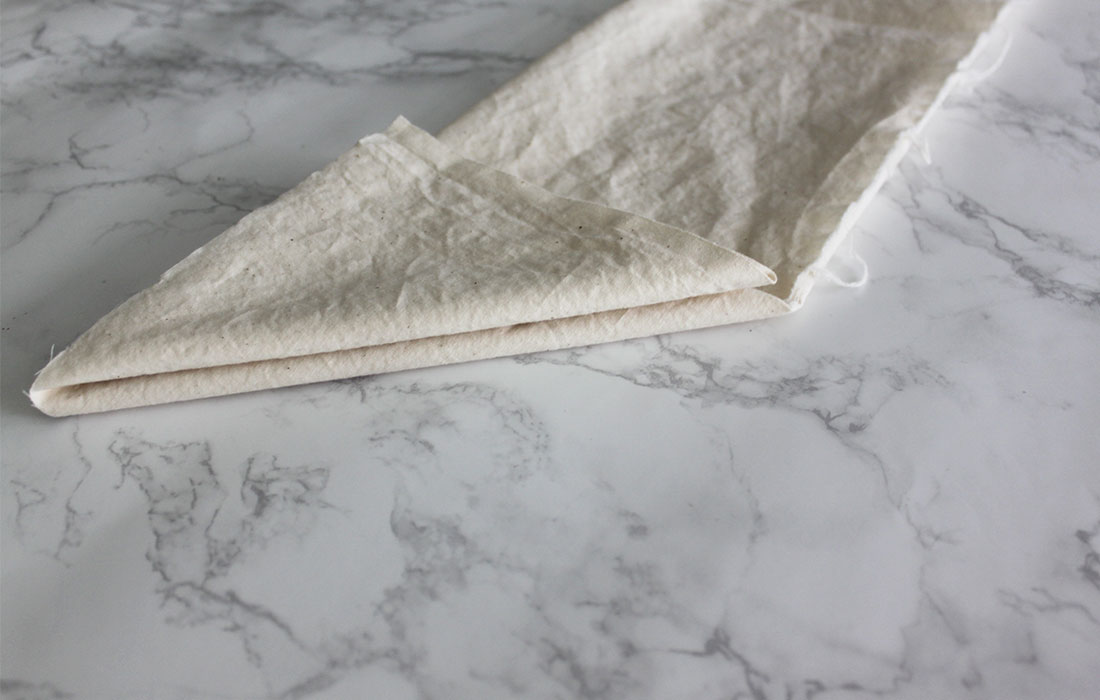
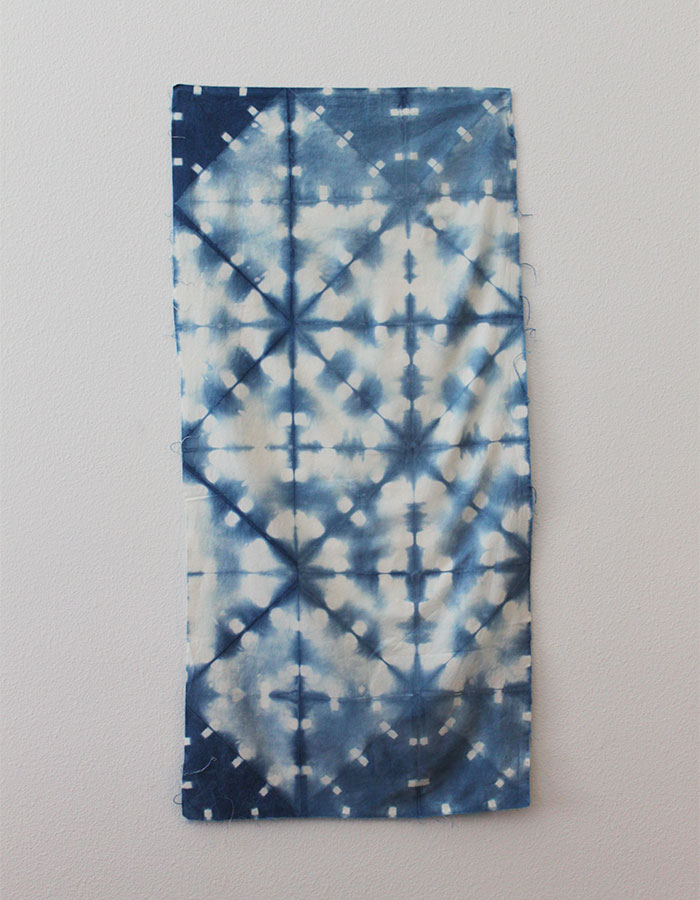
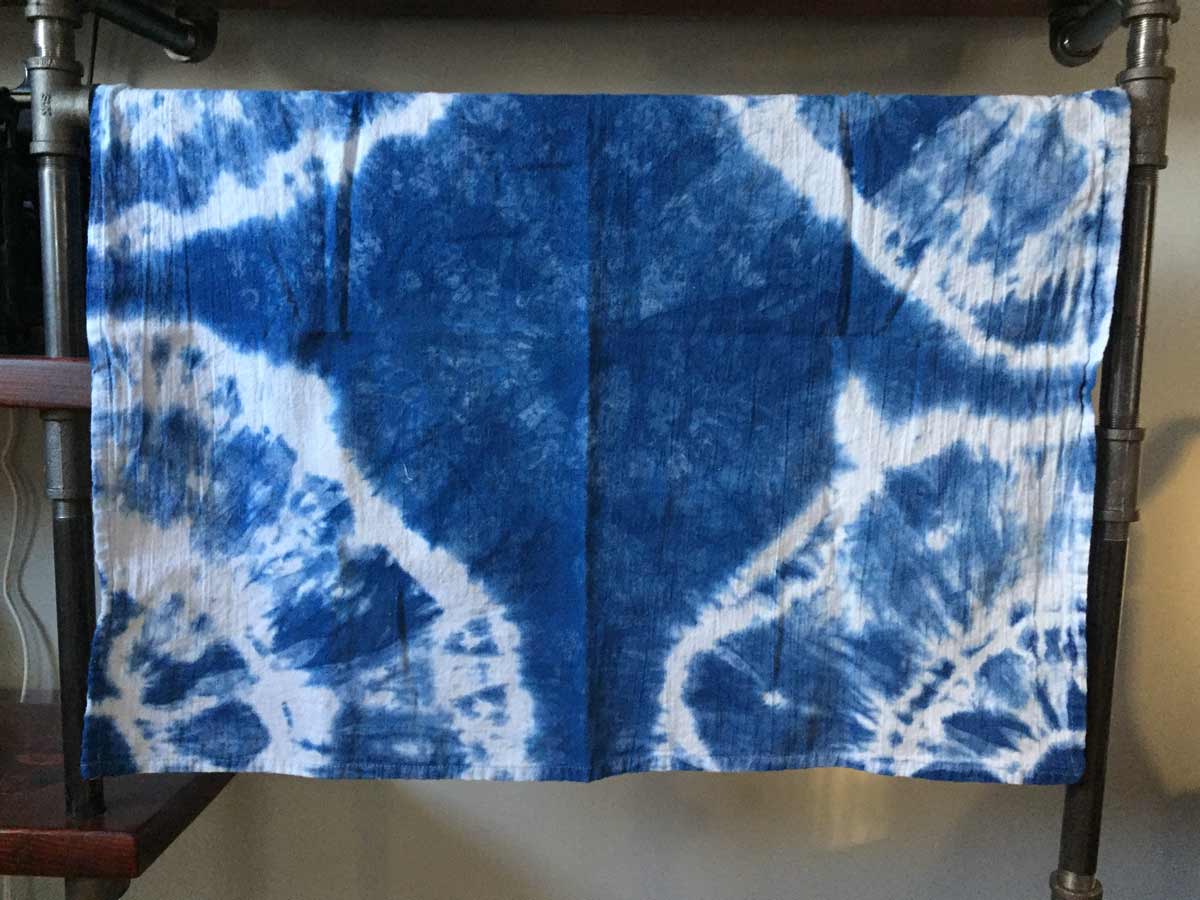
Accordion Grid Fold
This one is one of my favorites because it looks so purposeful, but also very abstract. A basic accordion fold is the base for so many different Shibori variations. I love to see which parts of the fabric the dye was able to reach. Accordion fold your fabric width-wise and then again length-wise.
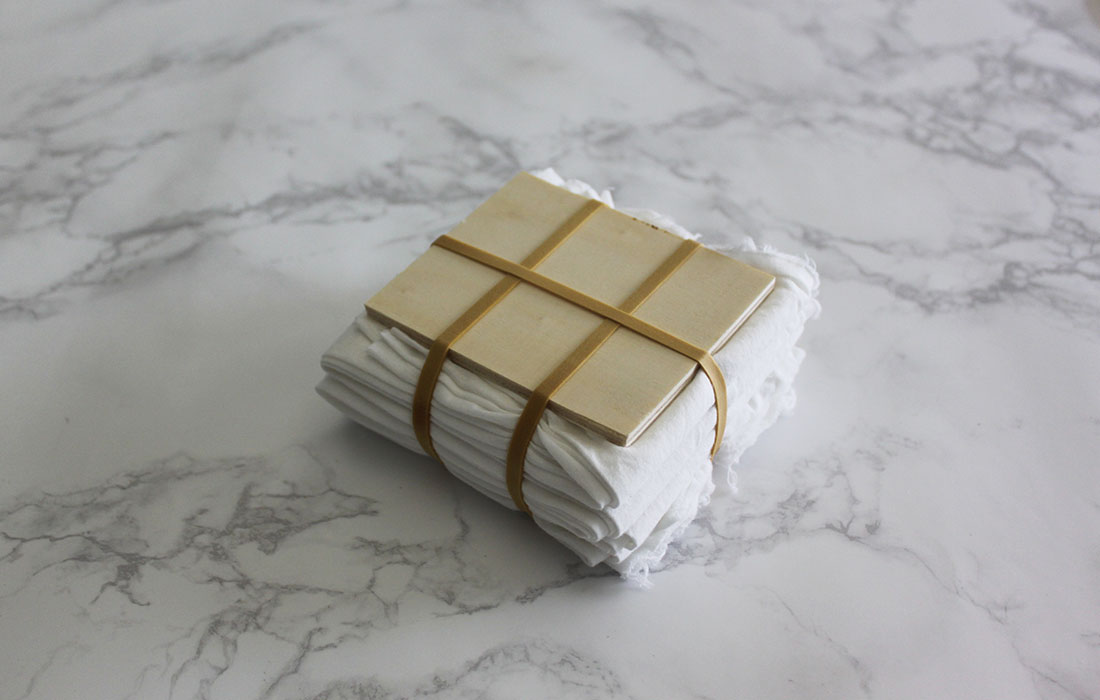
Put your wood blocks on each end (not a piece of glass because this will shatter when you press on it, oops) and secure with rubber bands.
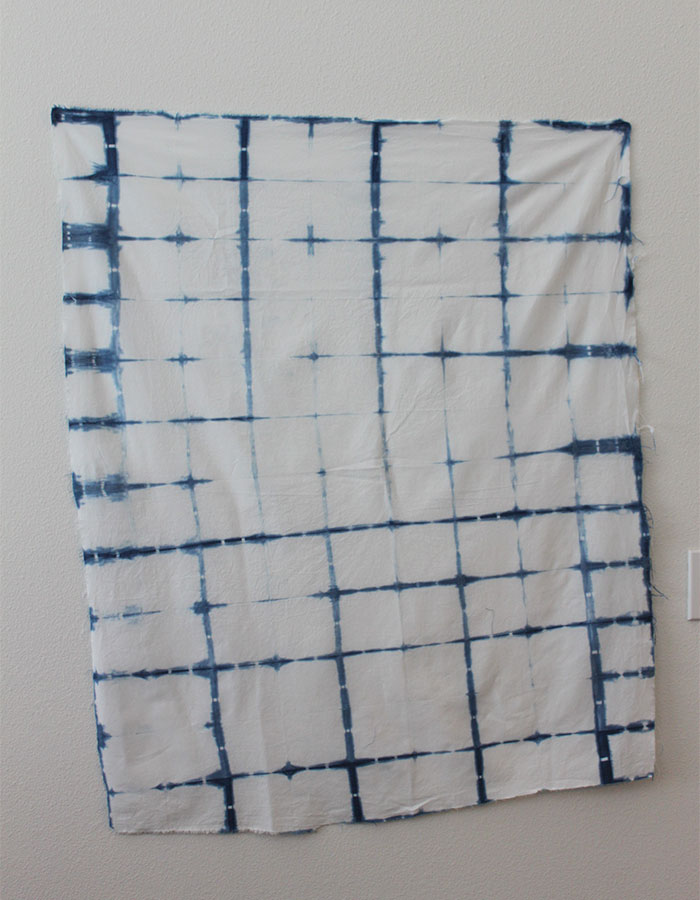
This is the finished product on bleached muslin. Lots of white still appears with this fold and wooden blocks.
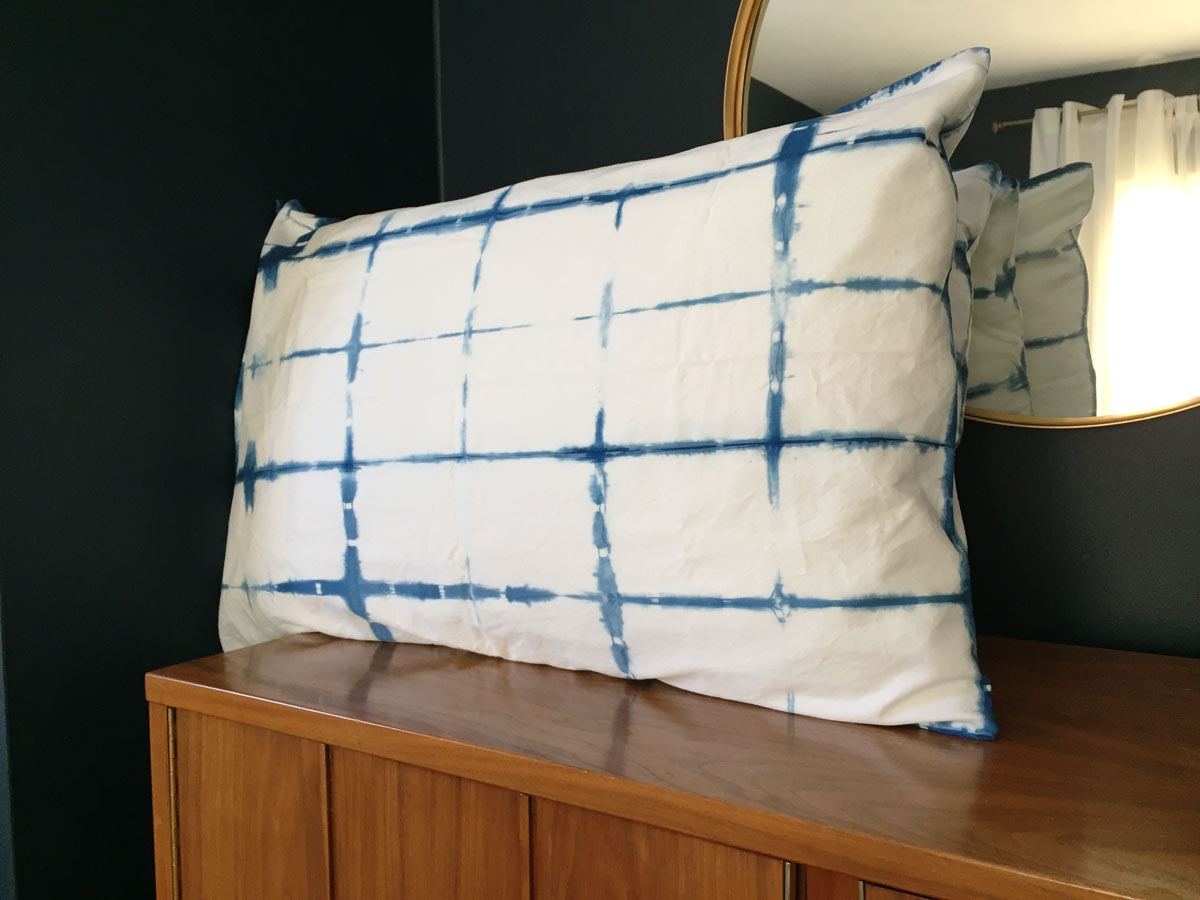
This pattern works out great on a cheap set of Ikea pillowcases. If you aren’t near an Ikea, these from Amazon look like they’d work. I was literally dying anything I could find at this point. I was about one step away from dying my underwear like I did at camp that one time.
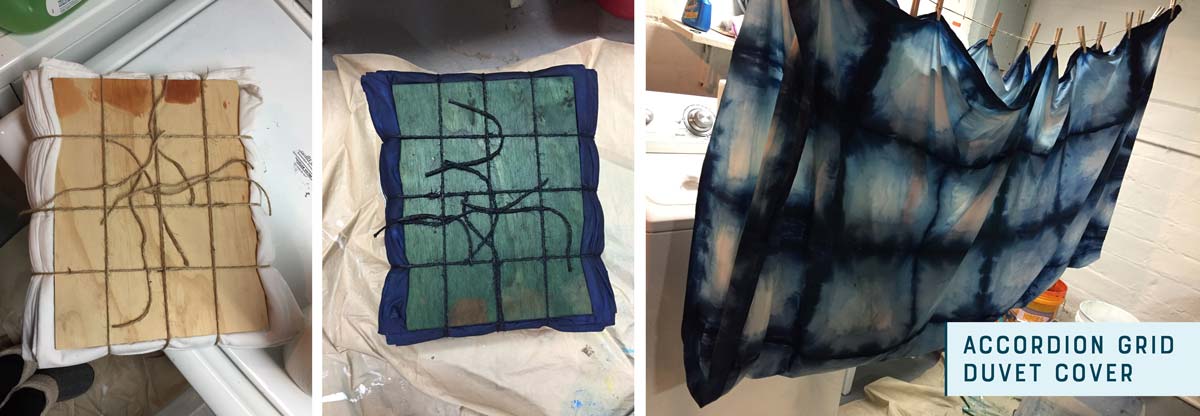
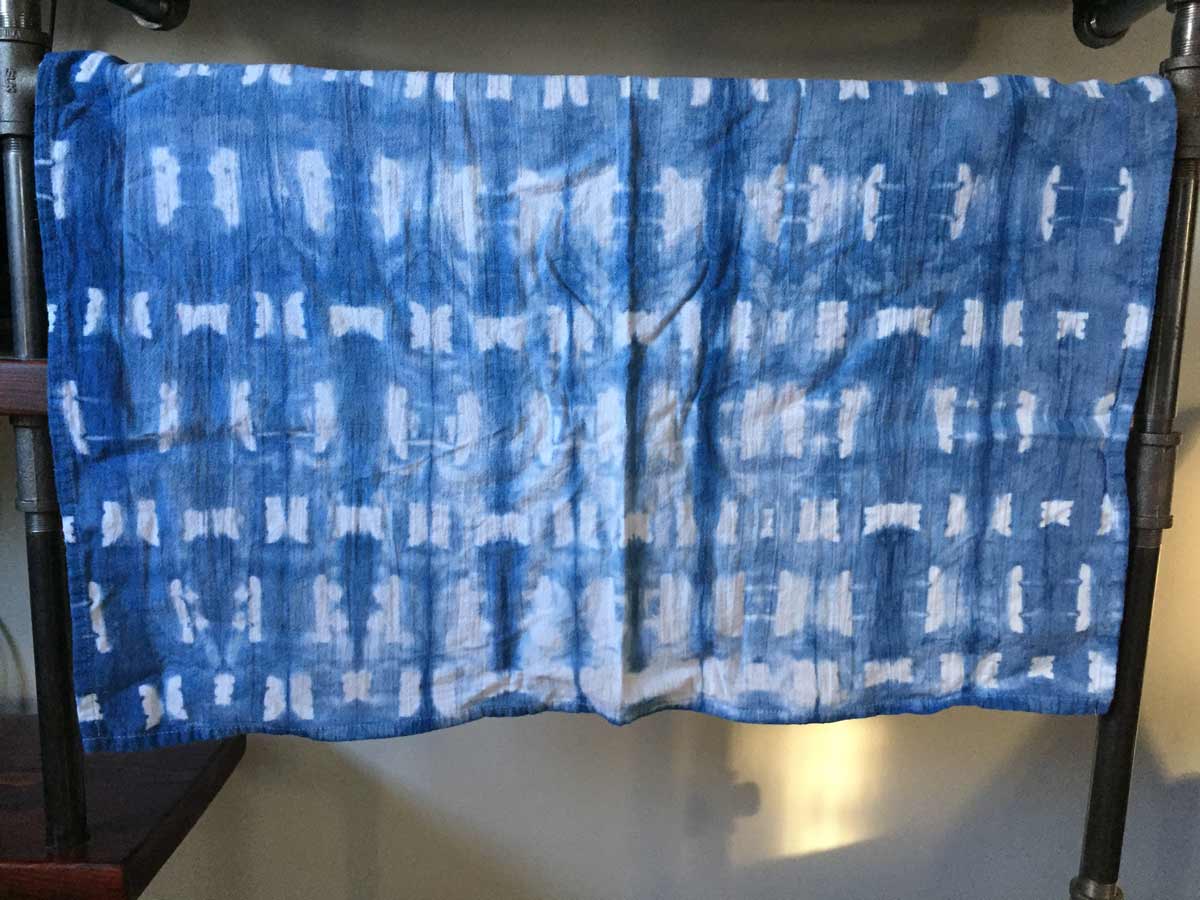
The process of accordion grid folding a duvet cover is the same, we just secured it using string since we didn’t have large enough rubberbands.
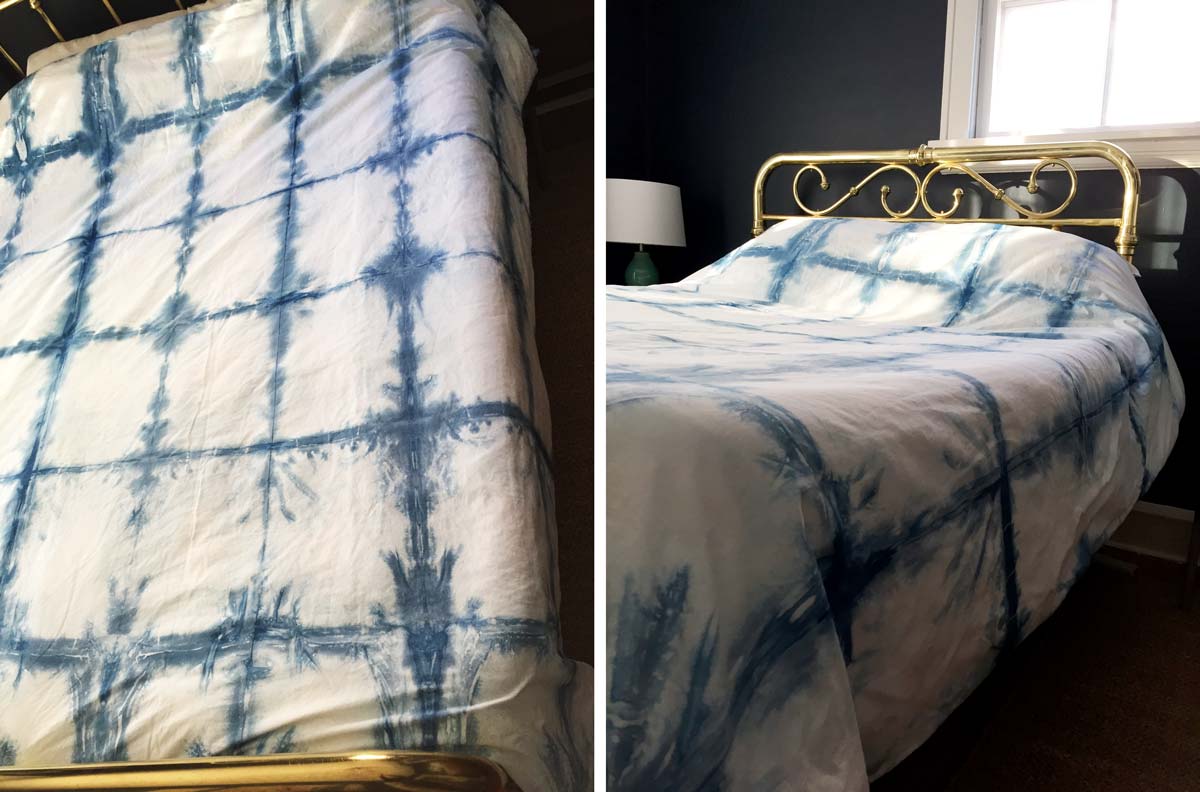
The finished product turned out a little bit lighter than the other things I dyed using this batch of indigo because the dye bath was about a week old. The kit says the dye bucket should last five days, but it still worked after seven. Please excuse the wrinkles, I couldn’t bring myself to iron the bed.
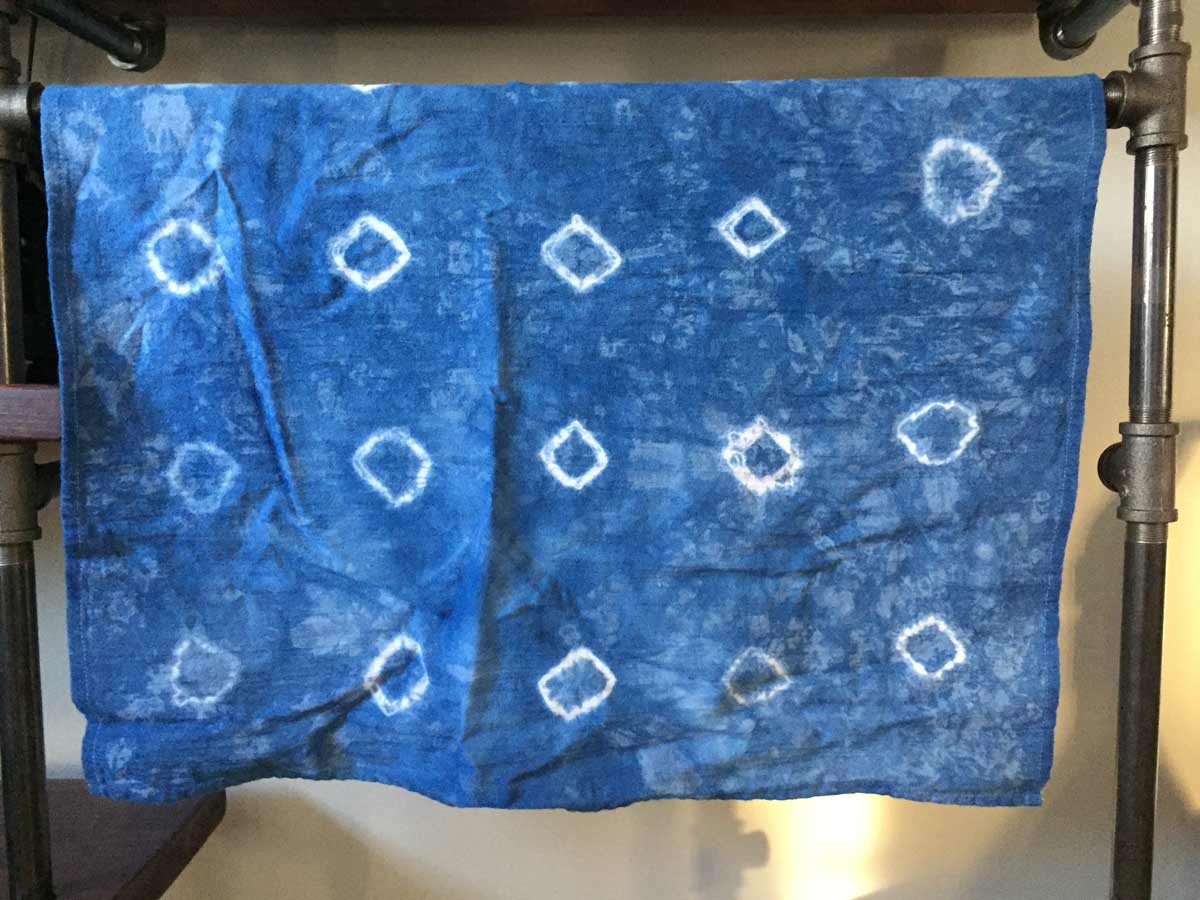
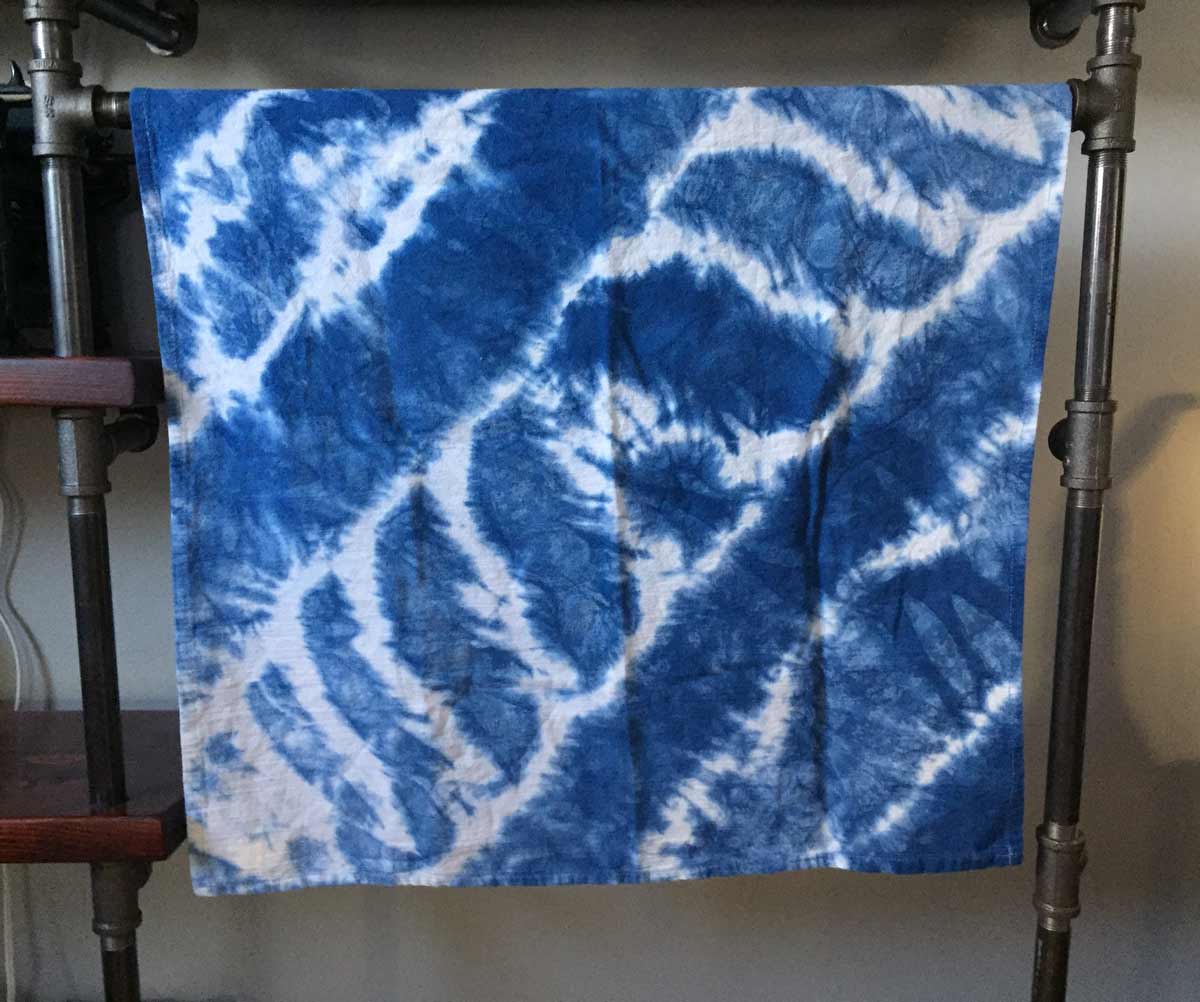
Clothespins or Binder Clips
Repeat the accordion fold but this time after folding width-wise, accordion fold in triangles length-wise.
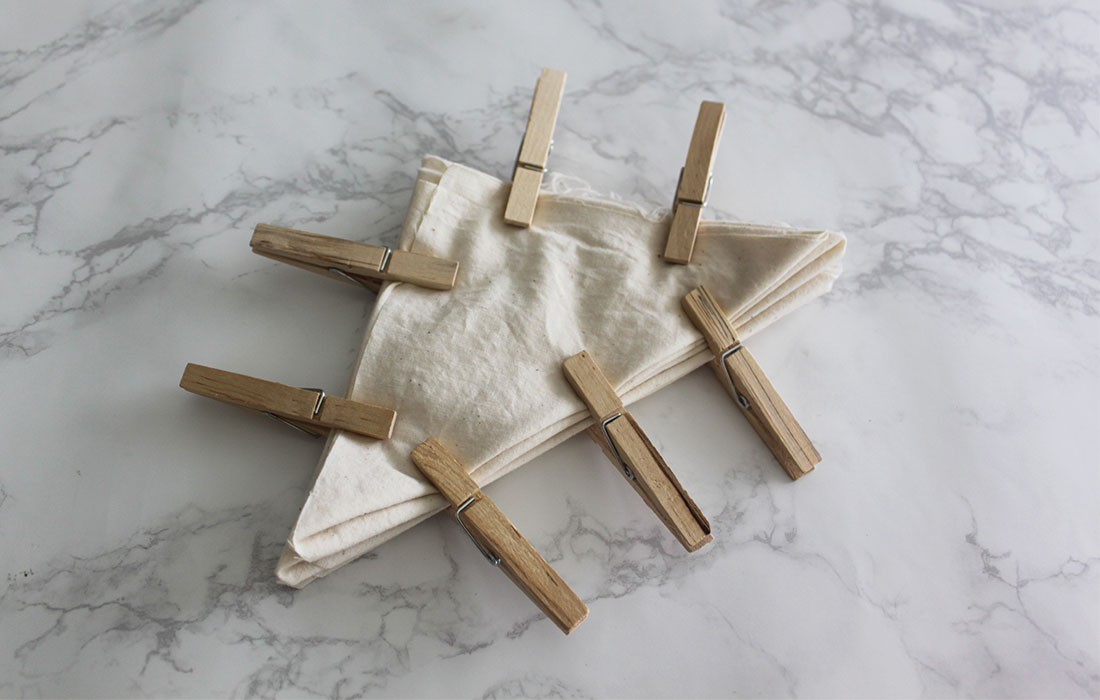
Secure the edges with clothespins or binder clips.
The finished product on unbleached muslin. The white is more cream colored.
This pattern is made from a mix of binder clips on an accordion folded tea towel.
PVC Pipe
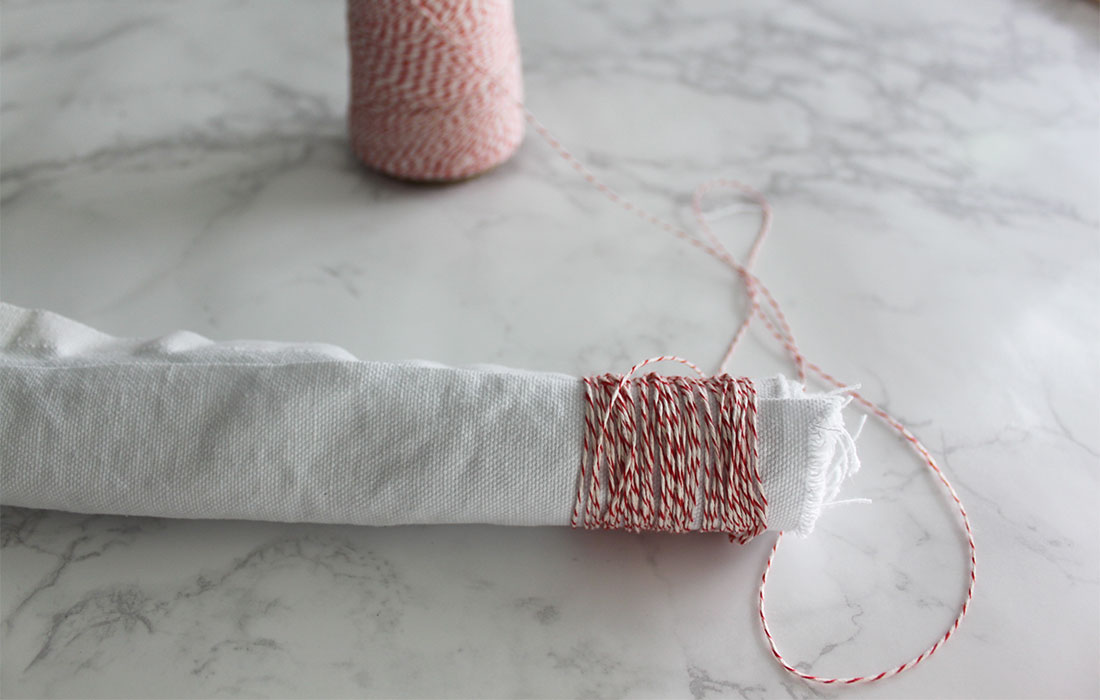
Wrap your fabric around a PVC Pipe (or around itself when you’re in a pinch) and secure with string or more rubber bands.
The finished piece on duck cloth. The texture of the material starts to come through but dyes easily.
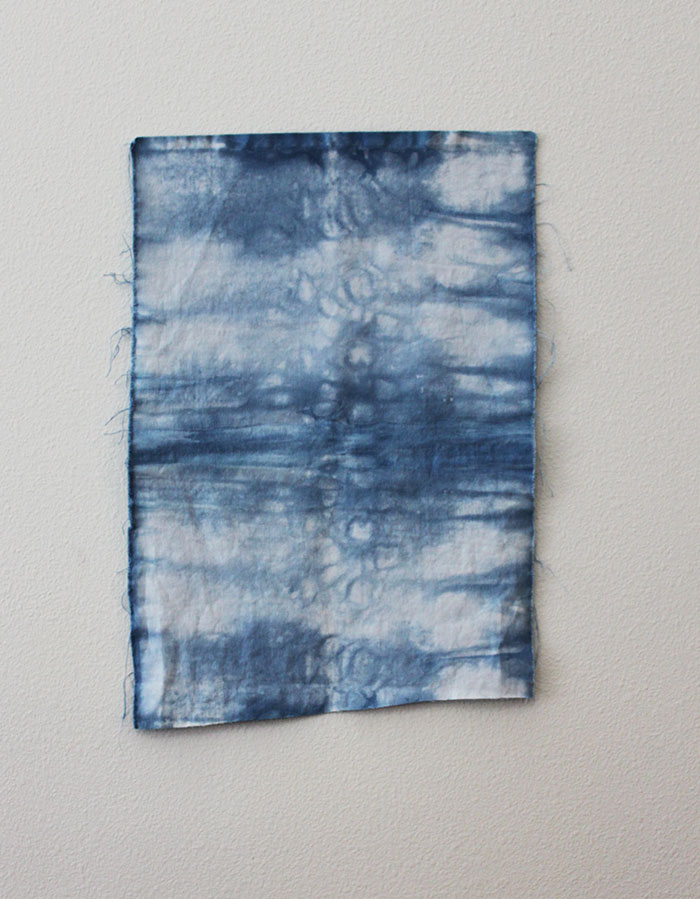
Sewn
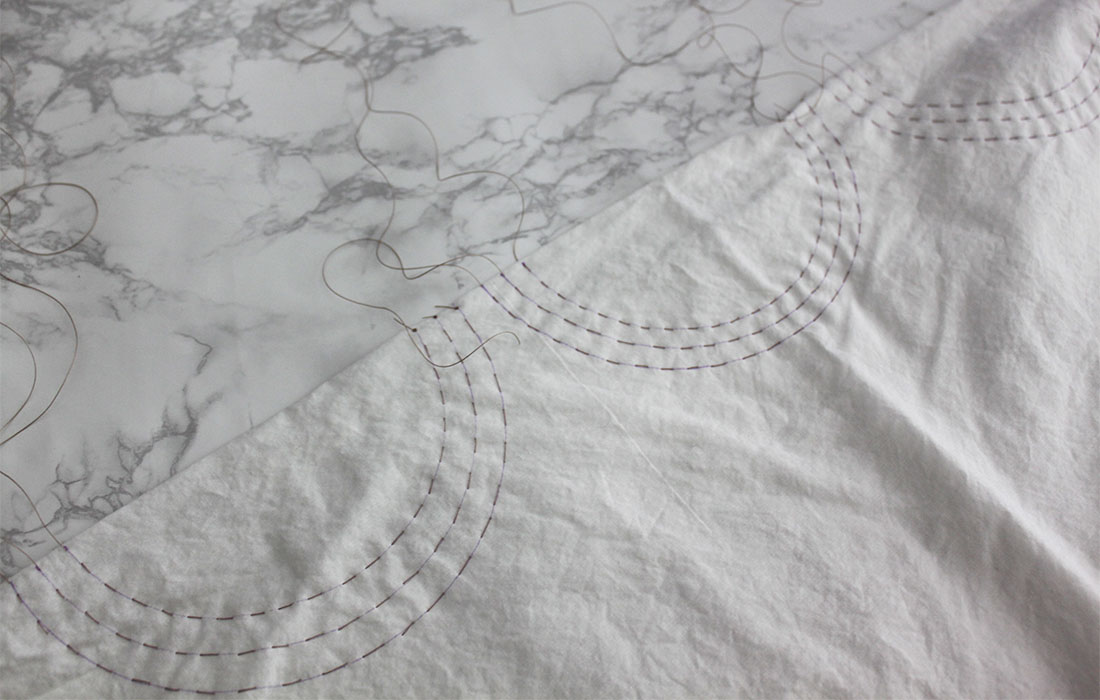
Sew a loose running stitch and pull tight to gather the fabric. Tie off with a large knot.
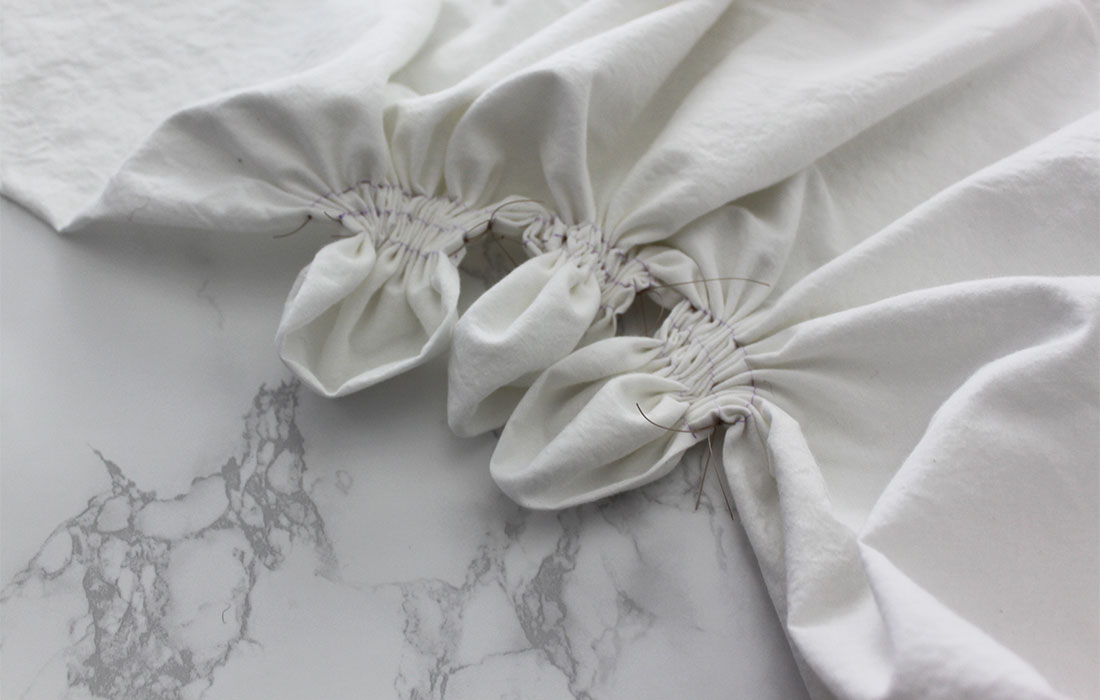
Try in a straight line or get tricky with some curves, circles, zig-zags, etc.
Finished product on bleached muslin.
Dip Dye
Literally just dip your fabric into the dye. If you continue to dip the ends in, you’ll get a nice gradient.
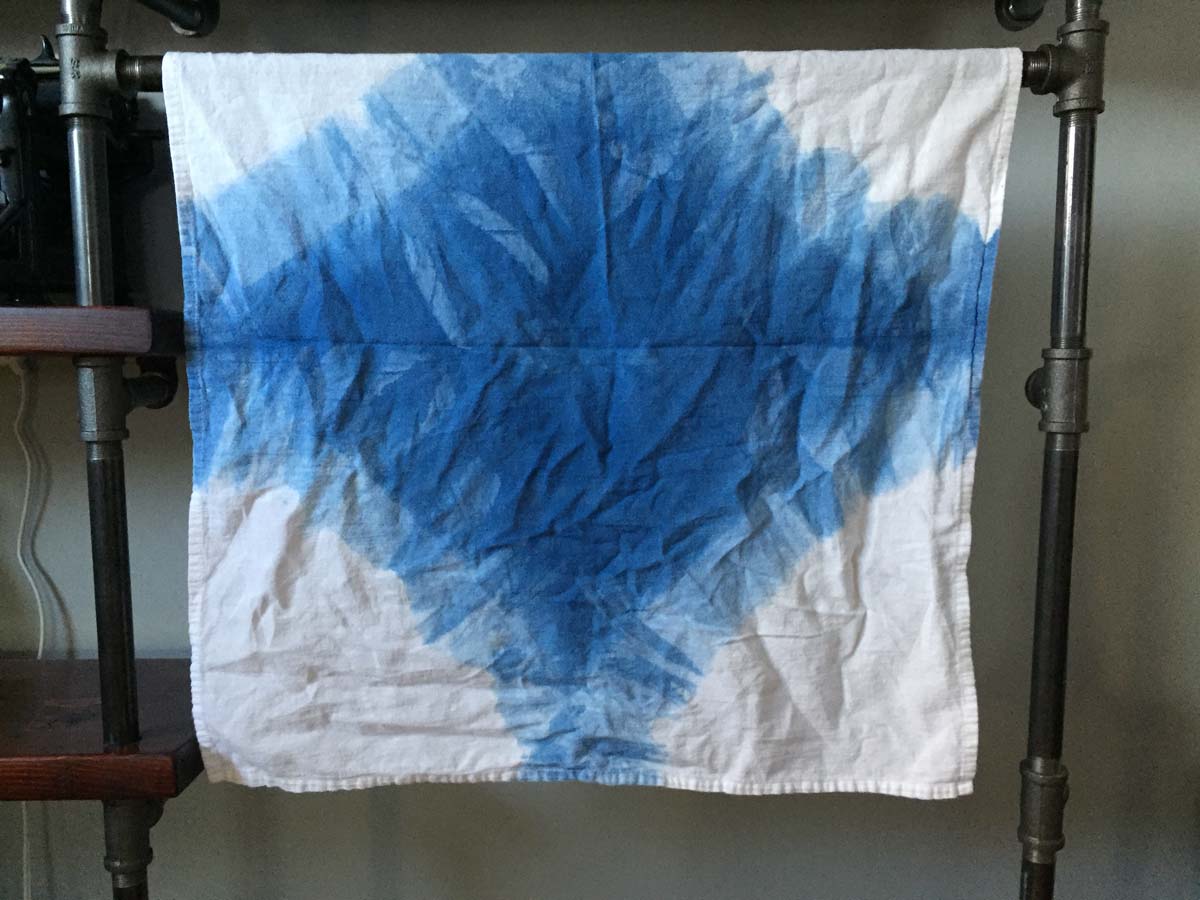
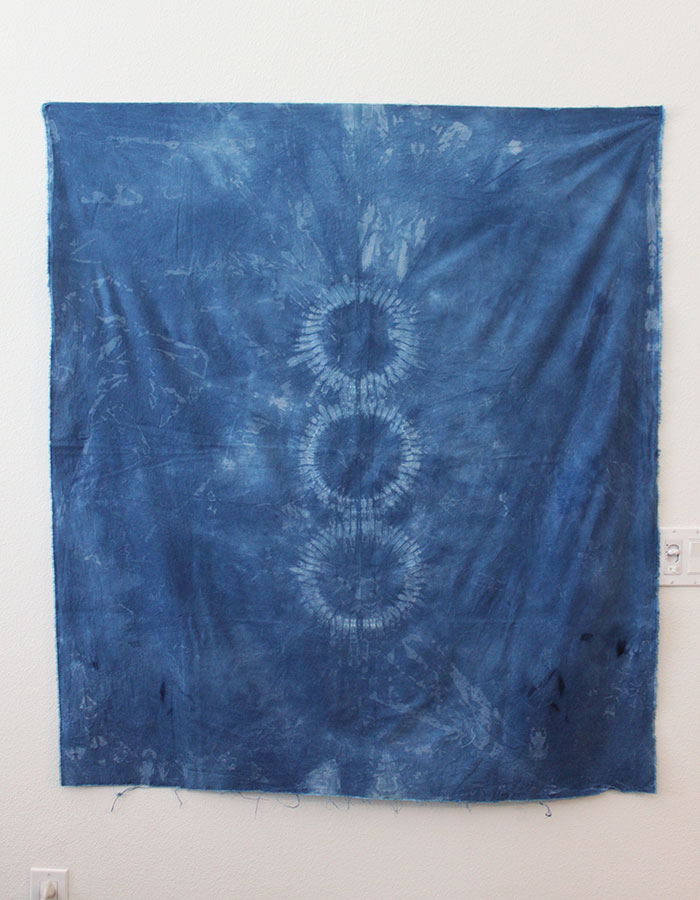
This dip dye pattern was created by holding all four corners of the tea towel together and dunking the center in the dye bucket.

For this dip dye look, roll up the tea towel and dip about half of the towel in the dye. After that is done, put a sliver of the other end in the dye.
Tie the fabric in knots
This shibori pattern is made by tying each corner in two knots.
To get this pattern on a tea towel, roll your towel from corner to corner. Then, tie a giant knot in the middle. Finish by tying each end in a knot.
Dying with Indigo
The important thing to note about indigo is that it contains a lot of sediment. Because of that you can’t plop your piece in like tie-dye and let it sit on the bottom till you’re ready to take out. Instead you have to submerge the piece fully within the bucket and hold it there till you’re ready to take it out. Get your long gloves prepared, it’s a little bit of a backbreaker.
In addition to your bucket of dye, set up the second bucket with clean water. Pre-wet your folded fabric in the water before submerging in the indigo. Slowly place your piece in the indigo (try not to get air bubbles) and hold below the surface. Slowly remove from the dye and let your piece rest while you start dying others. When you pull it out of the dye bath, your fabric will be lime green. Over the course of about 20 minutes, it turns a nice indigo blue. If it doesn’t look as dark as you’d like, re-submerge in your dye. To get a deep indigo you may have to dip 4-5 times.
When you’re happy with how dark your piece is looking (it will lighten after you wash it) quickly rinse in the clean water and un-bind your fabric. Hang on a clothesline or fence to let it finish oxidizing.
Once dry, wash all your pieces on delicate with mild detergent.
Note for Indigo dying with kids
Folding the fabric, tying it with rubberbands, clipping things on it, tying it in knots… kids LOVE this. Just make sure you have an adult there to set up the buckets and do any of the steps where you could touch the dye.
Have you tried dying with indigo? Trust us, once you do, you’ll end up looking around for anything white to dye. Be ready for some serious indigo in your life and show us how it turns out!
If you get the serious dye bug, try our other favorite technique of dying on the stovetop.